Breaking News

TerraMaster Launches Storage Upgrade Season with Up to 30% Off During Prime Big Deal Days COLORFUL Launches iGame Guard G114 140W GaN Multi-Port Charger INNO3D TOWER WORKSTATION AWS-511Z-R1 Thermal Grizzly and Noctua introduce WireView Pro II Noctua Edition GPU monitoring device Nikon releases the Z5IIC full-frame mirrorless camera

logo

  • Share Us
    • Facebook
    • Twitter
  • Home
  • Home
  • News
  • Reviews
  • Essays
  • About
    • Submit News

    • Contact Us
    • Privacy

    • Promotion
    • Advertise

    • RSS Feed

Search form

Vantec NexStar 3

Aug 5,2005 0

2. Package - Installation


Review Pages

1. Introduction
2. Package - Installation
3. HD Tach
4. WinBench 99
5. Performance Test v5.0
6. SiSoft Sandra 2005
7. Conclusion


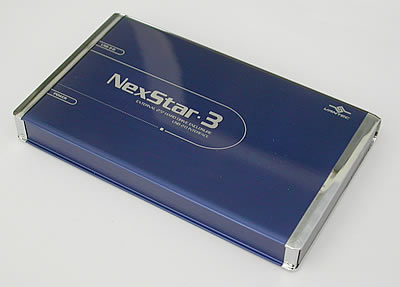
As soon as you open the package you'll see the NexStar 3 sealed in an anti static bag.
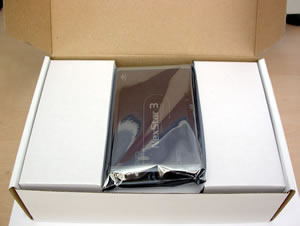
Remove the NexStar from the bag.

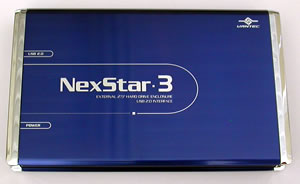
You'll need to remove the blue metallic cover in order to install the hard drive.

Place your 2.5" HD on the NexStar tray as shown in the following photo.

NexStar's HD slot

Hard Disk's connector

Slide the HD connector into the NexStar slot

NexStar with HD connected

Slide the tray back inside the metallic case.

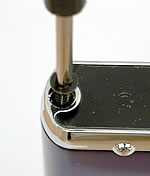
Don't forget the screws...

...and you're finished.

The included cable for connecting the NexStar to the PC has a mini USB connection on one end and two connections at the other end, one USB A and one USB A-A /M-F which connect to the USB ports on your PC. Some HDD require a considerable amount of current in order to work, 0.5~1.0A, so you'll you have to connect both USB A connectors to your PC. It is also possible to use an external supply instead, which connects to a 5VDC inlet on the back of the NexStar. Check the power requirements of your hard drive before installing. (The external power pack is not included in the package).

Mini USB connects to the NexStar

USB A-A/MF and USB A connect to the PC.

As soon as you connect the NexStar 3 to your PC, it will be identified and reported with the name of the installed HDD. In our case, we used an 80GB HD from Fujitsu.

The NexStar 3 should be detected by your OS and automatically installed. If you have any problems, you can consult the included manual.
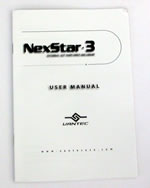
Installation Manual

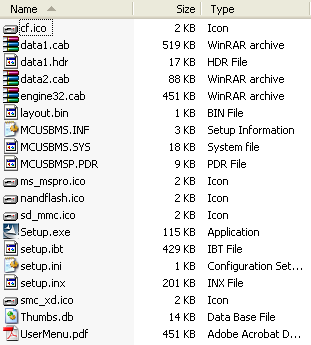
For Win98SE and Mac OS 8.6, you'll have to use the following CD in order to install the NexStar 3. For further instructions, consult the included manual. For Windows ME/XP/2000, no drivers are necessary.

Installation CD

The contents of the Installation CD

As soon as the NexStar 3 is identified by the OS, you'll have to initialise and partition the Hard Drive before using it. You can find further details on this in the manual. Note that the device will be recognised by the hard disk's ID and not as the NexStar.
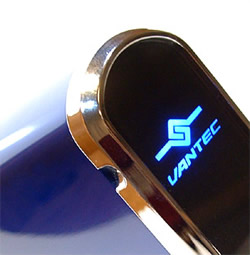
NexStar 3 while working

CAUTION: Never remove the NexStar 3 while it is in use. It is highly possible the HDD could be damaged or files corrupted.

We recommend you keep the NexStar 3 in its black case, protecting it against dust, scratches or any other kind of damage.


Review Pages

1. Introduction
2. Package - Installation
3. HD Tach
4. WinBench 99
5. Performance Test v5.0
6. SiSoft Sandra 2005
7. Conclusion


Pages

  • « first
  • ‹ previous
  • 1
  • 2
  • 3
  • 4
  • 5
  • 6
  • 7
  • next ›
  • last »

Vantec

Tags: Vantec
Previous Post
Teac HD 15OT & HD-15 PUK A
Next Post
ASUS A8N-SLI Premium

Related Posts

  • Vantec iCEBERQ6

  • Vantec NST-530U2 External Enclosure

  • Vantec PSU

  • New NexStar DX for DVD Burners

  • Vantec NexStar 3 eSATA

  • Vantec AVOX Jukebox Review

  • Vantec AVOX Jukebox

  • Vantec ICEBERQ 5

Latest Reviews

Fanxiang MP83 M.2 NVMe SSD Enclosure
Enterprise & IT

Fanxiang MP83 M.2 NVMe SSD Enclosure

Ugreen CM642 USB4.0 Enclosure
PC components

Ugreen CM642 USB4.0 Enclosure

be quiet! Dark Power 14 IO
PC components

be quiet! Dark Power 14 IO

SanDisk High Endurance 512GB microSDXC
Cameras

SanDisk High Endurance 512GB microSDXC

Samsung PRO Ultimate 512GB microSDXC
Cameras

Samsung PRO Ultimate 512GB microSDXC

Popular News

MSI’s Latest AMD X870E MAX & EVO Series Motherboards

MSI’s Latest AMD X870E MAX & EVO Series Motherboards

COLORFUL Launches iGame B850M ULTRA Series Micro-ATX Motherboards

COLORFUL Launches iGame B850M ULTRA Series Micro-ATX Motherboards

COLORFUL Presents Limited Edition Chitu MAG-60 Magnetic Keyboard Inspired by the Year of the Horse

COLORFUL Presents Limited Edition Chitu MAG-60 Magnetic Keyboard Inspired by the Year of the Horse

COLORFUL Presents iGame Z890 ULTRA-S W and iGame Z890M ULTRA Z Motherboards

COLORFUL Presents iGame Z890 ULTRA-S W and iGame Z890M ULTRA Z Motherboards

COLORFUL Launches iGame B850I MINI OC V14 Motherboard

COLORFUL Launches iGame B850I MINI OC V14 Motherboard

COLORFUL Expands B850 Motherboard Lineup with New CVN, Battle-Ax, and MEOW Models

COLORFUL Expands B850 Motherboard Lineup with New CVN, Battle-Ax, and MEOW Models

ASRock Adds Support for One Sub-Channel DRAM Module on Intel DDR5 Motherboards

ASRock Adds Support for One Sub-Channel DRAM Module on Intel DDR5 Motherboards

Exceed the Infinite with New ASRock X870E Taichi White Motherboard

Exceed the Infinite with New ASRock X870E Taichi White Motherboard

Main menu

  • Home
  • News
  • Reviews
  • Essays
  • About
    • Submit News

    • Contact Us
    • Privacy

    • Promotion
    • Advertise

    • RSS Feed
  • About
  • Privacy
  • Contact Us
  • Promotional Opportunities @ CdrInfo.com
  • Advertise on out site
  • Submit your News to our site
  • RSS Feed