Breaking News

ZOTAC to Showcase New Graphics Card Models, Handheld Consoles, and AI-accelerated Systems at COMPUTEX 2025 ZHIYUN Launches CINEPEER SMOOTH 5E Mainstream Smartphone Gimbal xMEMS Unveils Sycamore-W – The World’s Thinnest Speaker Engineered for Smart Watches and Fitness Bands Samsung announces Galaxy S25 Edge DJI announces Mavic 4 Pro

logo

  • Share Us
    • Facebook
    • Twitter
  • Home
  • Home
  • News
  • Reviews
  • Essays
  • Forum
  • Legacy
  • About
    • Submit News

    • Contact Us
    • Privacy

    • Promotion
    • Advertise

    • RSS Feed
    • Site Map

Search form

Thermaltake Element Q

Nov 20,2009 0

3. Inside


Review Pages

1. About the Thermaltake Element Q
2. A closer look
3. Inside
4. Final thoughts


In order to open the box you need need to use a screwdriver. It would be nice if Thermaltake had used thumb type screws here but but anyway we can live with it. After removing the screws the cover slides back and it can be removed.

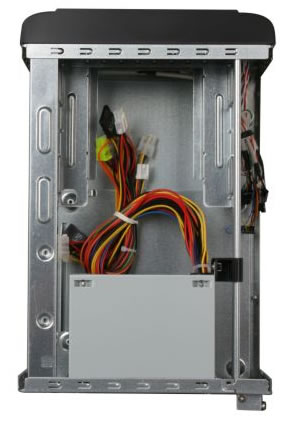
There is a lot of empty space in the box, allowing for easy installation of the mini-ATX motherboard and the HDD. The power supply unit offers many cables in order to power SATA or molex type devices:

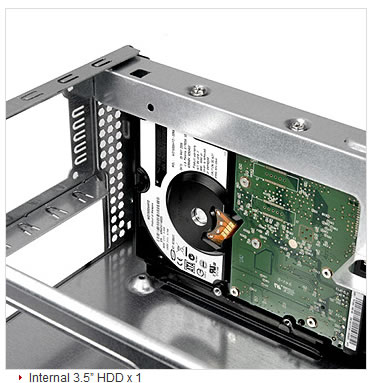
Thermaltake suggests to install the 3.5" on the right using the two installation rails, which is very easy to do as we will see later on.
The front cover is also very easy to remove. Just push the four clips inside the case and apply small force.
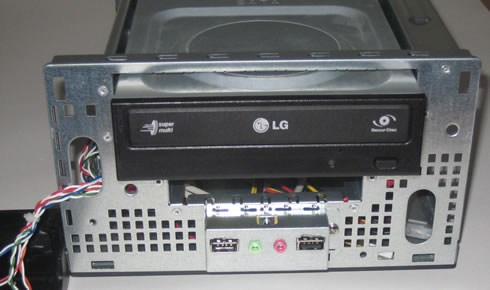
How about starting the installation? Firstly, you have to attach and secure the mini-ATX motherboard using the screws included in the case bundle. Then you have to install the memory modules and the 24pin power jack. Finally, getting the HD Audio and USB ports for the front panel is highly suggested. Shortly after, here is how your case should look like:
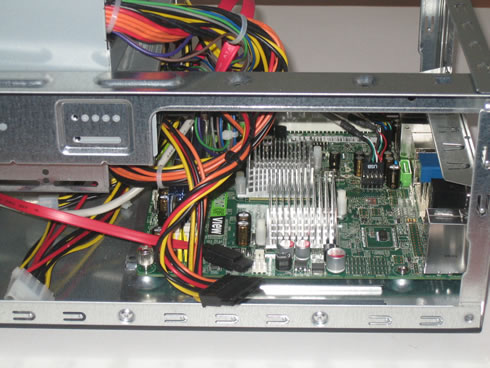
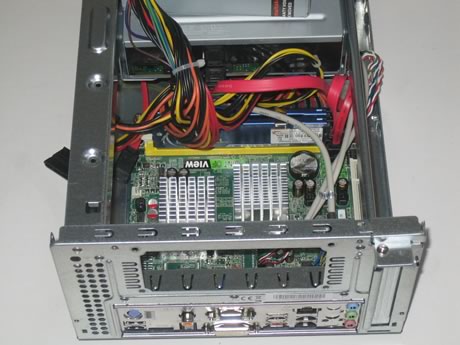
There is a lot of empty space left below the floppy drive area, where you can push all unwanted cables and tide them up. The 5.25" installation requires you to remove the front panel first and then to push the drive inside and fasten it with screws. Again, the procedure is very easy. After getting the SATA/power connected you are ready to go. Make sure to use only SATA optical drives since most mini-ATX motherboards do not offer IDA ports!

Let's put the power supply again at its place get the HDD installed.

The two rails help a lot here and after sliding the HDD in the right position, you will have to fasten the HDD using two mounting screws. Connecting the cabling can be a little bit tricky but you can handle it for sure.
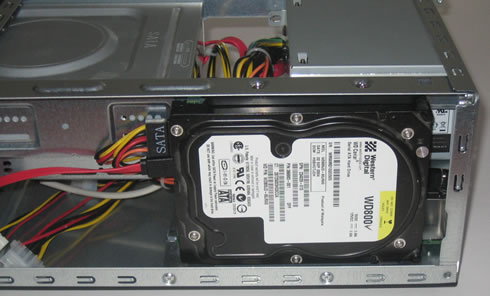
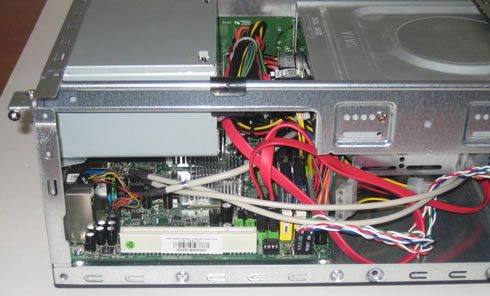
One more picture from the internal. As you can see the cables are enough and a careful tide would help a lot:
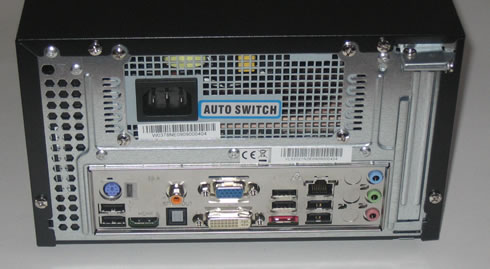
OK, we have everything installed and closed the external case, ready for use:

 

Review Pages

1. About the Thermaltake Element Q
2. A closer look
3. Inside
4. Final thoughts


Pages

  • « first
  • ‹ previous
  • 1
  • 2
  • 3
  • 4
  • next ›
  • last »

Thermaltake

Tags: Thermaltake
Previous Post
Gainward GT240
Next Post
Gainward GT220 Vs Inno3D GT210

Related Posts

  • Thermaltake Unveils the Massive EXTREME with Cross-flow Fan

  • Thermaltake Releases the Toughpower TF3 1300W with Support for RTX50 Series GPUs

  • Thermaltake Unveils G6 Direct Drive Racing Wheel Bundle and GM5 3DOF Motion System

  • Thermaltake Launches the TT150 LED Bag in Different Sizes and New Colors

  • Thermaltake New TH V2 Ultra EX ARGB Sync AIO – Snow Edition is Now Available Worldwide

  • Thermaltake Coolers Support New-Gen Intel and AMD CPUs

  • Thermaltake Reveals the CTE E550 TG Mid Tower Chassis with Panoramic Viewing

  • Thermaltake The Tower 300 Series Chassis Releases New Colors in Matcha Plum and Peach Fuzz

Latest Reviews

Addlink P30 1TB Portable SSD
PC components

Addlink P30 1TB Portable SSD

How Online Casinos Create the Illusion of Las Vegas
Enterprise & IT

How Online Casinos Create the Illusion of Las Vegas

Arctic Liquid Freezer III 360 Pro Argb
Cooling Systems

Arctic Liquid Freezer III 360 Pro Argb

be quiet! Dark Mount Keyboard
PC components

be quiet! Dark Mount Keyboard

be quiet! Light Mount Keyboard
PC components

be quiet! Light Mount Keyboard

Popular News

COLORFUL Announces the Launch of the CVN Z790D5 ARK FROZEN Motherboard

COLORFUL Announces the Launch of the CVN Z790D5 ARK FROZEN Motherboard

AsRock, NZXT, Biostar and Gigabyte announces X870 motherboards

AsRock, NZXT, Biostar and Gigabyte announces X870 motherboards

COLORFUL, AsRock, NZXT, MSI announce Intel Z890 Motherboards

COLORFUL, AsRock, NZXT, MSI announce Intel Z890 Motherboards

COLORFUL Presents the B860 Series Motherboards

COLORFUL Presents the B860 Series Motherboards

COLORFUL Introduces CVN B850I GAMING FROZEN Motherboard

COLORFUL Introduces CVN B850I GAMING FROZEN Motherboard

Intel-AMD new motherboards announced

Intel-AMD new motherboards announced

COLORFUL Presents the COLORFIRE B650M-MEOW WIFI Motherboard, Supports AMD Ryzen 9000 Series CPUs

COLORFUL Presents the COLORFIRE B650M-MEOW WIFI Motherboard, Supports AMD Ryzen 9000 Series CPUs

COLORFUL Presents CVN X870 ARK FROZEN Motherboard for AMD Ryzen 9000 CPUs

COLORFUL Presents CVN X870 ARK FROZEN Motherboard for AMD Ryzen 9000 CPUs

Main menu

  • Home
  • News
  • Reviews
  • Essays
  • Forum
  • Legacy
  • About
    • Submit News

    • Contact Us
    • Privacy

    • Promotion
    • Advertise

    • RSS Feed
    • Site Map
  • About
  • Privacy
  • Contact Us
  • Promotional Opportunities @ CdrInfo.com
  • Advertise on out site
  • Submit your News to our site
  • RSS Feed