Patriot Memory Valkyrie NAS review
4. Features
All the available adjustments and settings are provided in two navigation bars, one horizontal and another one that extends vertically on the left:

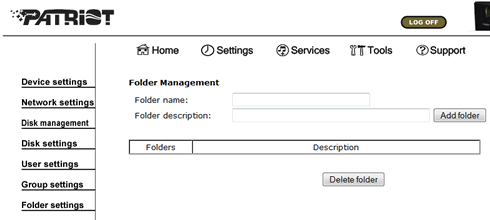
At the folder management section you can can create folders and name them. For each folder, you are able to setup user access rights (see Users below) . By default, access rights are set to "Set access for individual users" with "No access" selected for each group & user (this means you can select the rights for each group & user on an individual basis). With "Set access for individual users" and "No access" selected, you can change each group & users "Properties to share" by selecting either No access (that group or user has no access to this folder), Read-only (that group or user has read only access to this folder), Read and write (that group or user has read and write access to this folder):
The Group section allows you to setup a number of users into a group. You can then
give this group user rights to folders (allowing all members of the group the user
rights you have set):

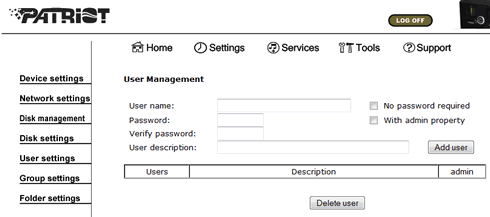
The User Management window allows you to enter a User name, Password and
Description. A user can opt to have no password or can be also given admin rights to specific folders if you like
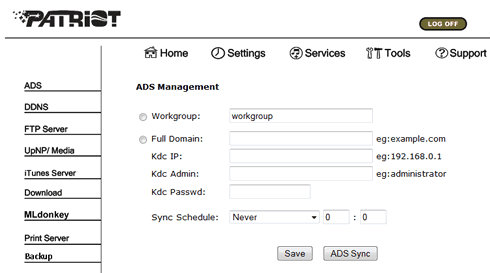
The Services section allows you to adjust the main features of the Valkyrie product. First we set the a name for our workgroup:
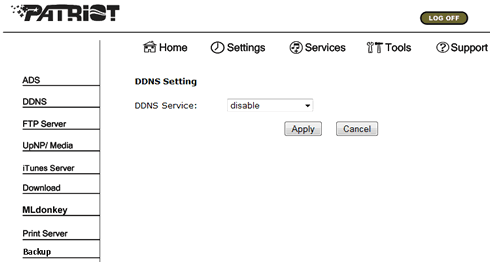
The DDNS service is required if you want to access the device through the internet (dyndns.org) and outside the LAN.
For most home users, broadband connectivity is provided to the
customer via a dynamic IP address. The name describes that the IP is always changing.
For users that need to access files at home via Remote Desktop, an IP address
associated with "your" computer/home network is needed. Since the IP is always
changing, it would not be possible to track down that IP. This is when DDNS becomes
helpful. To enable DDNS on the VALKYRIE NAS,
create an account with any DDNS host service. The DDNS host will normally require you to then login with your username and
password once you receive the authentication email.
On the Account Services page, click on "Add Host Services" and then "Add
Dynamic DNS Host".
You will be able to choose from several domain names. Example:
antdns.com. Pick a domain name and then come up with a sub-domain. Example:
yourname. Your unique domain name looks like yourname.antdns.com. You will use
this hostname to access your server or home computer. Leave the IP address field
blank.
Now set up the VALKYRIE by setting up the DDNS section.
Pick your DDNS host from the list.
Enter your Username and Password.
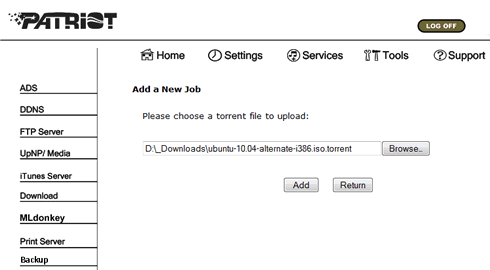
The device also supports BitTorrent downloading. It can download and upload Torrent files, however, it
cannot go onto the internet and find Torrent files for you.
You must find the torrent seed file, and then add that seed file as a new job to the device. The VALKYRIE will then run in the background, downloading and storing
the torrent file.
We tried to download Ubuntu. The torrent file should be stored in your local HDD:

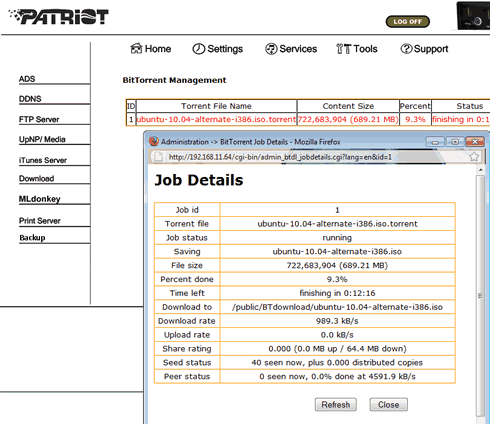
The procedure is rather easy, but there are no advanced options such as like blocking peers:
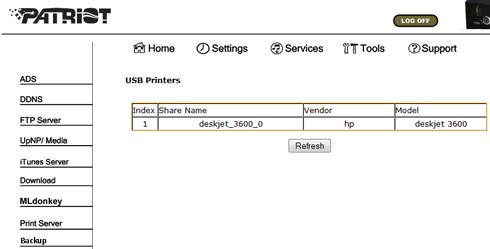
The Print Server function works very well, at least our HP Deskjet 3600 device. Of course, in order all the network PCs to have access to the printer, you should manually add it in each of these PCs. (Enter My Network Places on PC - Select Printers and Faxes - . Select Add Printer - Follow on screen instructions)