Breaking News

LG Electronics Advances the LG Sound Suite Experience With New DTS DJI Delivers First Drone Dock with Automated, 25-Second Battery Swaps ASUS Announces ExpertBook A7 (AMD) Kioxia Introduces Direct Liquid Cooling Support for Enterprise SSDs Apple announces new product for 2026

logo

  • Share Us
    • Facebook
    • Twitter
  • Home
  • Home
  • News
  • Reviews
  • Essays
  • About
    • Submit News

    • Contact Us
    • Privacy

    • Promotion
    • Advertise

    • RSS Feed

Search form

Vantec NexStar 3 eSATA

Dec 22,2005 0

2. Installation


Review Pages

1. Introduction
2. Installation
3. HD Tach
4. Performance Test v5.0
5. SiSoftware Sandra
6. PCMark05
7. eSATA vs USB2.0
8. Conclusion


The installation process is quite easy and no special skills are required to setup the NexStar 3 (NST-360SU-BK). You will need a 3.5" SATA Hard Disc Drive since this is not included in the package. For our tests, we used a Serial ATA Western Digital 300Gb HDD.
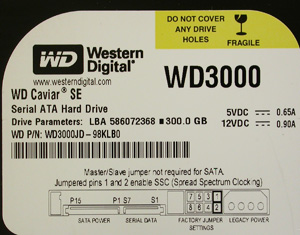
the WD3000 we used...

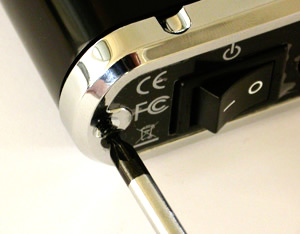
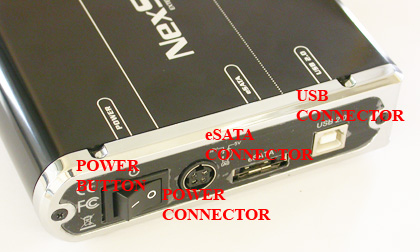
To open the NexStar 3, you have to remove the back plate, which has the connections and the power button on it. The back plate is not initially screwed on to the case and simply pops out. There are two screws included in the package so you can screw the back plate on after the installation of the HDD.
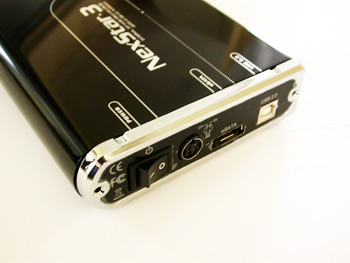
After removing the back plate, you'll have to mount the HDD onto the drive caddy. Connect the SATA drive to the SATA/Power Cable.

the drive caddy...

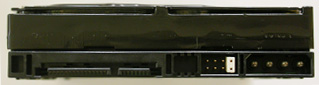
the WD3000 connections....

the drive connected...

In order for the HDD to sit firmly and properly in the drive caddy, you have to screw it on. The picture below shows the screws, which are located on the sides.
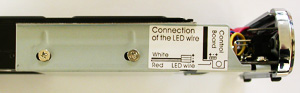
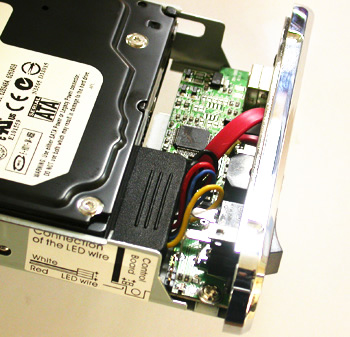
Insert the drive caddy into the aluminum case and connect the LED cable before closing the unit.
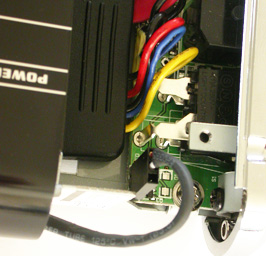
And don't forget the screws...
Connect the USB cable or the eSATA cable to your PC, then the external power supply and you are ready to roll. Turn on the power button and your system should automatically recognize the NexStar 3. In the case that it is not recognized by the Operating System, you can install the drivers found on the drivers CD included.
 

Review Pages

1. Introduction
2. Installation
3. HD Tach
4. Performance Test v5.0
5. SiSoftware Sandra
6. PCMark05
7. eSATA vs USB2.0
8. Conclusion


Pages

  • « first
  • ‹ previous
  • 1
  • 2
  • 3
  • 4
  • 5
  • 6
  • 7
  • 8
  • next ›
  • last »

Vantec

Tags: Vantec
Previous Post
Plextor PX-755A
Next Post
SONY DW-Q30A

Related Posts

  • Vantec iCEBERQ6

  • Vantec NST-530U2 External Enclosure

  • Vantec PSU

  • New NexStar DX for DVD Burners

  • Vantec AVOX Jukebox Review

  • Vantec AVOX Jukebox

  • Vantec NexStar 3

  • Vantec ICEBERQ 5

Latest Reviews

Fanxiang MP83 M.2 NVMe SSD Enclosure
Enterprise & IT

Fanxiang MP83 M.2 NVMe SSD Enclosure

Ugreen CM642 USB4.0 Enclosure
PC components

Ugreen CM642 USB4.0 Enclosure

be quiet! Dark Power 14 IO
PC components

be quiet! Dark Power 14 IO

SanDisk High Endurance 512GB microSDXC
Cameras

SanDisk High Endurance 512GB microSDXC

Samsung PRO Ultimate 512GB microSDXC
Cameras

Samsung PRO Ultimate 512GB microSDXC

Popular News

MSI’s Latest AMD X870E MAX & EVO Series Motherboards

MSI’s Latest AMD X870E MAX & EVO Series Motherboards

COLORFUL Launches iGame B850M ULTRA Series Micro-ATX Motherboards

COLORFUL Launches iGame B850M ULTRA Series Micro-ATX Motherboards

COLORFUL Presents Limited Edition Chitu MAG-60 Magnetic Keyboard Inspired by the Year of the Horse

COLORFUL Presents Limited Edition Chitu MAG-60 Magnetic Keyboard Inspired by the Year of the Horse

COLORFUL Launches iGame B850I MINI OC V14 Motherboard

COLORFUL Launches iGame B850I MINI OC V14 Motherboard

COLORFUL Presents iGame Z890 ULTRA-S W and iGame Z890M ULTRA Z Motherboards

COLORFUL Presents iGame Z890 ULTRA-S W and iGame Z890M ULTRA Z Motherboards

COLORFUL Launches the iGame X870E VULCAN W OC Motherboard

COLORFUL Launches the iGame X870E VULCAN W OC Motherboard

COLORFUL Expands B850 Motherboard Lineup with New CVN, Battle-Ax, and MEOW Models

COLORFUL Expands B850 Motherboard Lineup with New CVN, Battle-Ax, and MEOW Models

ASRock Adds Support for One Sub-Channel DRAM Module on Intel DDR5 Motherboards

ASRock Adds Support for One Sub-Channel DRAM Module on Intel DDR5 Motherboards

Main menu

  • Home
  • News
  • Reviews
  • Essays
  • About
    • Submit News

    • Contact Us
    • Privacy

    • Promotion
    • Advertise

    • RSS Feed
  • About
  • Privacy
  • Contact Us
  • Promotional Opportunities @ CdrInfo.com
  • Advertise on out site
  • Submit your News to our site
  • RSS Feed