Breaking News

Apple introduces new AirTag with expanded connectivity range and improved findability The Highly Anticipated Samsung Galaxy Z TriFold will be Available in U.S. Starting this Week Sharkoon announces SKILLER SGB15 bundle Firewalla Introduces a Simpler Way to Remodel Large, Flat Home Networks with Zero Trust LG Electronics Unveils New LG MAGNIT Micro LED Display at ISE 2026

logo

  • Share Us
    • Facebook
    • Twitter
  • Home
  • Home
  • News
  • Reviews
  • Essays
  • Forum
  • Legacy
  • About
    • Submit News

    • Contact Us
    • Privacy

    • Promotion
    • Advertise

    • RSS Feed
    • Site Map

Search form

Thermaltake Power Express 250W

May 26,2006 0

3. Installation


Review Pages

1. Introduction
2. A Closer Look
3. Installation
4. Performance
5. Conclusion


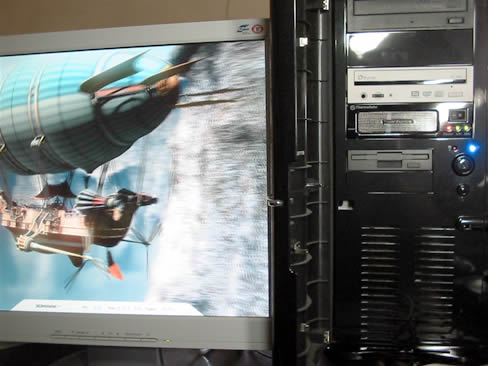
For our review, we used the following testbed:

  • Processor: AMD64 4800+ (939 socket)
  • Case: Thermaltake Soprano
  • Motherboard: MSI K8N Diamond + WiFi
  • Graphics cards: XFX 7800GTX 256MB in SLI mode
  • Memory: 2x512MB Kingston KVR400
  • Hard Disk Drives: WD2500JS (SATA II) 250GB 7200RPM, WD3000JD (SATA) 300GB 7200RPM
  • DVD Burner: NEC ND-3520A, Plextor PX-708A
  • Floppy disc
  • Power Supply: Akasa PowerPlus 650Watt
  • OS: Microsoft WindowsXP Pro SP2
  • DirectX: v9.0c
  • Nvidia ForceWare: 84.21

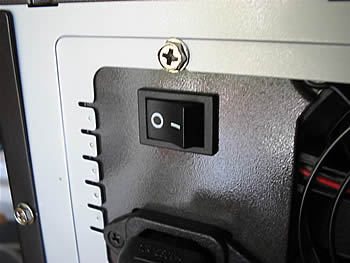
First, start by turning off the main power supply and remove the power cable from the socket.

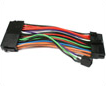
Open the case, unplug the 24-pin ATX power cable running from the main power supply to the motherboard, and connect it to the 24-pin adapter supplied in the Thermaltake bundle.

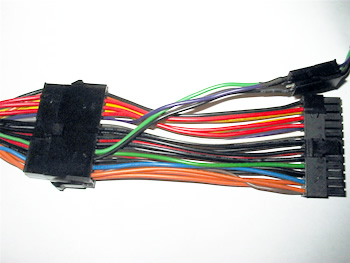
Then connect the adapter to the motherboard's ATX power connector...

The next step is to install the Thermaltake PSU in the 5.25" drive bay. We used a Thermaltake Soprano case, which offers sliding guide-rails for installing 5.25'' devices, so all we had to do was screw the guide rails onto the sides of the Thermaltake PSU. Nice and simple. :-P

Sliding guide-rail, designed for easy 5.25'' device installation...

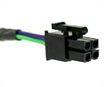
Now, with the PSU in position, connect the 4-pin connector located on the Thermaltake PSU to the 24-pin adapter, which is connected to the motherboard...

4-pin connector 24-pin adapter

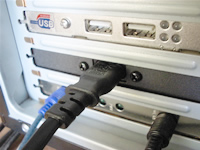
Don't forget to connect the PCI-Express Connectors on the Graphics cards...

And finally, remove one expansion slot cover and screw in the AC power PCI bracket to the back of the chassis. At this point, we had to remove our FireWire bracket, since there were no spare slots.... :-(

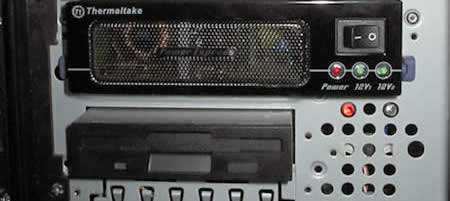
Plug the power cord into the socket, turn on the main power supply, then the Thermaltake power supply and fire-up this power demanding 'beast!!'....

Up and running...

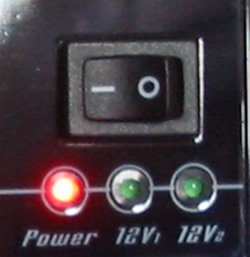
Power LEDs while in idle...

Power LEDs while gaming...


Review Pages

1. Introduction
2. A Closer Look
3. Installation
4. Performance
5. Conclusion


Pages

  • « first
  • ‹ previous
  • 1
  • 2
  • 3
  • 4
  • 5
  • next ›
  • last »

Thermaltake

Tags: Thermaltake
Previous Post
Logitech G1 Optical Mouse
Next Post
ASUS A8R32-MVP Deluxe

Related Posts

  • Thermaltake Launches AW360/420 AIO Liquid Cooler and WAir CPU Cooler for Workstations

  • Begin the Racing Journey with the Thermaltake GR300 Racing Simulator Cockpit

  • Thermaltake Unveils the Massive EXTREME with Cross-flow Fan

  • Thermaltake Releases the Toughpower TF3 1300W with Support for RTX50 Series GPUs

  • Thermaltake Unveils G6 Direct Drive Racing Wheel Bundle and GM5 3DOF Motion System

  • Thermaltake Launches the TT150 LED Bag in Different Sizes and New Colors

  • Thermaltake New TH V2 Ultra EX ARGB Sync AIO – Snow Edition is Now Available Worldwide

  • Thermaltake Coolers Support New-Gen Intel and AMD CPUs

Latest Reviews

be quiet! Power Zone 2 1200W
PC components

be quiet! Power Zone 2 1200W

The Difference Between American and European Stakes and Why It Changes How People Bet
Enterprise & IT

The Difference Between American and European Stakes and Why It Changes How People Bet

Endorfy Thock V2 Wireless Keyboard
PC components

Endorfy Thock V2 Wireless Keyboard

Noctua NH-D15 G2 Chromax.Black
Cooling Systems

Noctua NH-D15 G2 Chromax.Black

EnGenius ECW520 AP
Enterprise & IT

EnGenius ECW520 AP

Popular News

COLORFUL Introduces CVN B850I GAMING FROZEN Motherboard

COLORFUL Introduces CVN B850I GAMING FROZEN Motherboard

COLORFUL Presents CVN X870 ARK FROZEN Motherboard for AMD Ryzen 9000 CPUs

COLORFUL Presents CVN X870 ARK FROZEN Motherboard for AMD Ryzen 9000 CPUs

TEAMGROUP Launches EXPERT P34F Find My External SSD

TEAMGROUP Launches EXPERT P34F Find My External SSD

ASRock AM5 Motherboards Now Fully Support AMD Ryzen 9 9950X3D & 9900X3D Processors

ASRock AM5 Motherboards Now Fully Support AMD Ryzen 9 9950X3D & 9900X3D Processors

Samsung announces Galaxy Tab S11 and Galaxy S25 FE series

Samsung announces Galaxy Tab S11 and Galaxy S25 FE series

Viltrox Showcases Upcoming Lens Lineup and New TTL Flash at IBC 2025

Viltrox Showcases Upcoming Lens Lineup and New TTL Flash at IBC 2025

CORSAIR announces Vanguard Pro 96 and Vanguard 96 Gaming Keyboards

CORSAIR announces Vanguard Pro 96 and Vanguard 96 Gaming Keyboards

Panasonic Introduces the First Ultra-Telephoto Zoom Lens in the LUMIX S Series

Panasonic Introduces the First Ultra-Telephoto Zoom Lens in the LUMIX S Series

Main menu

  • Home
  • News
  • Reviews
  • Essays
  • Forum
  • Legacy
  • About
    • Submit News

    • Contact Us
    • Privacy

    • Promotion
    • Advertise

    • RSS Feed
    • Site Map
  • About
  • Privacy
  • Contact Us
  • Promotional Opportunities @ CdrInfo.com
  • Advertise on out site
  • Submit your News to our site
  • RSS Feed