Breaking News

Micron Announces New 2600 NVMe SSD HighPoint Launches Next-Gen External PCIe Gen5 x16 Switching Adapter LG Display Begins Mass Production of Ultimate Gaming OLED Panel with 4th-Generation OLED Technology PlayStation Plus Monthly Games for July 2025 Samsung Releases Smart Monitor M9 With AI-Powered QD-OLED Display

logo

  • Share Us
    • Facebook
    • Twitter
  • Home
  • Home
  • News
  • Reviews
  • Essays
  • Forum
  • Legacy
  • About
    • Submit News

    • Contact Us
    • Privacy

    • Promotion
    • Advertise

    • RSS Feed
    • Site Map

Search form

Thermaltake Hardcano 14

Jan 18,2006 0

2. Installation


Review Pages

1. Introduction
2. Installation
3. Performance
4. Conclusion


Before proceeding with the installation procedure, we should add that the Hardcano has another advantage. It essentially adds one more slot for a hard disk on your case, since the case fits in the wide, 5.25" bay where normally your CD and DVD drives go. This was handy in our case where we only had three slots for hard drives and all were occupied. Moreover, all those hard disks so close to one another, amounts to temperature buildup.

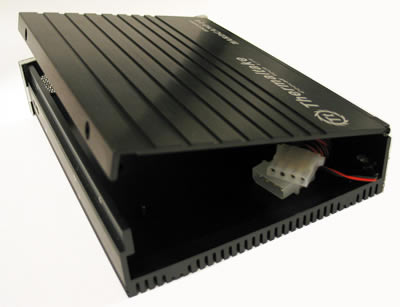
Begin by installing the hard disk inside the Hardcano 14's case, a fairly simple task. First, un-screw the two screws on the right side of the case and open the shell (see photos below).

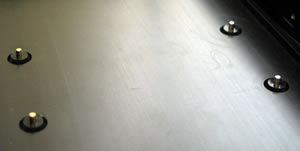
Apply the two thermal pads to the "floor" and "ceiling" of the case (i.e. the top and base of the inside of the shell as shown in the photos below), in the position where the hard disk will be situated.

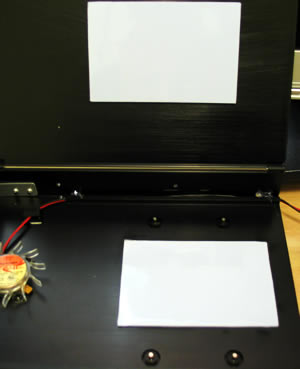
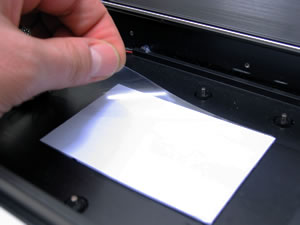
Peel off the plastic transparent protective strips from each pad.


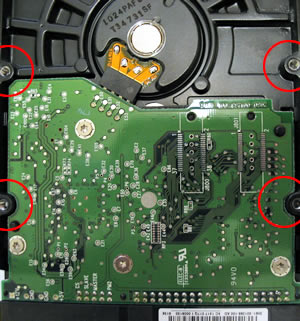
There are four metallic standoffs on the base of the case which line up with the four mounting holes on the bottom of the hard drive (see photos below). If for some reason, when you close the case, the top of the case does not contact the top of the hard drive, there are rubber pads that can be inserted on the standoffs to raise the hard drive. When properly installed, the top of the hard drive (i.e. the surface with the metal cover and not that with the pcb) should press firmly against the thermal pad on the cover of the Hardcano 14.

Once you have done this, close the shell and replace the two side screws. The hard disk that has just been installed in the Hardcano, contacts only the upper thermal pad for heat dissipation. It does not contact and should not contact the one under the hard drive, on the base of the case, as it can cause damage to the hard disk's pcb. We are not sure why this pad needs to be installed as it doesn't play any role, however, after speaking with Thermaltake, they advised us that it needs to be installed.

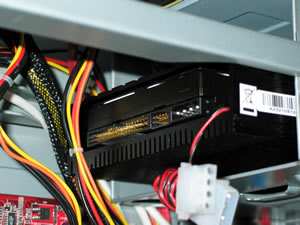
Install the Hardcano 14 in your PC case in an empty 5.25" drive bay slot. You then need to provide power to the fan, connect the IDE/SATA.SCSI cable and power to the hard disk.

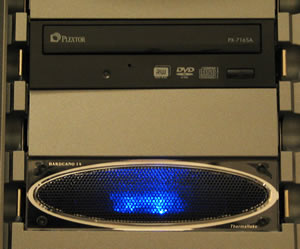
The result is quite impressive...

...especially when the Hardcano begins operation.


Review Pages

1. Introduction
2. Installation
3. Performance
4. Conclusion


Pages

  • « first
  • ‹ previous
  • 1
  • 2
  • 3
  • 4
  • next ›
  • last »

Thermaltake

Tags: Thermaltake
Previous Post
Making Professional DVD from Authoring to Replication
Next Post
ASUS Extreme N7800GT Dual

Related Posts

  • Thermaltake Unveils the Massive EXTREME with Cross-flow Fan

  • Thermaltake Releases the Toughpower TF3 1300W with Support for RTX50 Series GPUs

  • Thermaltake Unveils G6 Direct Drive Racing Wheel Bundle and GM5 3DOF Motion System

  • Thermaltake Launches the TT150 LED Bag in Different Sizes and New Colors

  • Thermaltake New TH V2 Ultra EX ARGB Sync AIO – Snow Edition is Now Available Worldwide

  • Thermaltake Coolers Support New-Gen Intel and AMD CPUs

  • Thermaltake Reveals the CTE E550 TG Mid Tower Chassis with Panoramic Viewing

  • Thermaltake The Tower 300 Series Chassis Releases New Colors in Matcha Plum and Peach Fuzz

Latest Reviews

be quiet! Pure power 13M 750W
PC components

be quiet! Pure power 13M 750W

JSAUX 65Wh Rog Ally Battery
Gaming

JSAUX 65Wh Rog Ally Battery

Introducing PriceHub
Enterprise & IT

Introducing PriceHub

Viltrox AF 50mm F2.0 Air
Cameras

Viltrox AF 50mm F2.0 Air

Toshiba Canvio Flex 2TB
Enterprise & IT

Toshiba Canvio Flex 2TB

Popular News

COLORFUL Announces the Launch of the CVN Z790D5 ARK FROZEN Motherboard

COLORFUL Announces the Launch of the CVN Z790D5 ARK FROZEN Motherboard

AsRock, NZXT, Biostar and Gigabyte announces X870 motherboards

AsRock, NZXT, Biostar and Gigabyte announces X870 motherboards

COLORFUL Introduces CVN B850I GAMING FROZEN Motherboard

COLORFUL Introduces CVN B850I GAMING FROZEN Motherboard

COLORFUL Presents the B860 Series Motherboards

COLORFUL Presents the B860 Series Motherboards

COLORFUL Presents CVN X870 ARK FROZEN Motherboard for AMD Ryzen 9000 CPUs

COLORFUL Presents CVN X870 ARK FROZEN Motherboard for AMD Ryzen 9000 CPUs

COLORFUL, AsRock, NZXT, MSI announce Intel Z890 Motherboards

COLORFUL, AsRock, NZXT, MSI announce Intel Z890 Motherboards

Intel-AMD new motherboards announced

Intel-AMD new motherboards announced

COLORFUL Presents the COLORFIRE B650M-MEOW WIFI Motherboard, Supports AMD Ryzen 9000 Series CPUs

COLORFUL Presents the COLORFIRE B650M-MEOW WIFI Motherboard, Supports AMD Ryzen 9000 Series CPUs

Main menu

  • Home
  • News
  • Reviews
  • Essays
  • Forum
  • Legacy
  • About
    • Submit News

    • Contact Us
    • Privacy

    • Promotion
    • Advertise

    • RSS Feed
    • Site Map
  • About
  • Privacy
  • Contact Us
  • Promotional Opportunities @ CdrInfo.com
  • Advertise on out site
  • Submit your News to our site
  • RSS Feed