Breaking News

ASUS Republic of Gamers Announces ROG GR70 Gaming Mini PC ASUS ROG Unveils Rapture GT-BE19000AI, the World’s First AI Gaming Router TerraMaster Unveils TOS 7 Insider Preview CORSAIR Steps Into the Ring, Announces Novablade Pro Wireless Hall Effect Leverless Fight Controller PROGRADE DIGITAL ANNOUNCES PG25 PRO THUNDERBOLT 5 DOCK

logo

  • Share Us
    • Facebook
    • Twitter
  • Home
  • Home
  • News
  • Reviews
  • Essays
  • Forum
  • Legacy
  • About
    • Submit News

    • Contact Us
    • Privacy

    • Promotion
    • Advertise

    • RSS Feed
    • Site Map

Search form

Thermaltake Blue Orb II

Oct 26,2005 0

2. Installation


Review Pages

1. Introduction
2. Installation
3. Performance
4. Conclusion


The Blue Orb II can be attached to both Intel 775 and AMD 939 sockets. Let's start with an AMD 939 socket based motherboard.

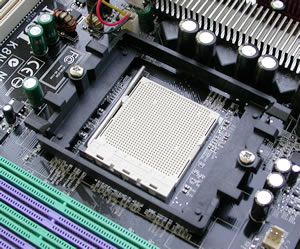
The 939 socket with the stock mounting system
...remove the plastic base...

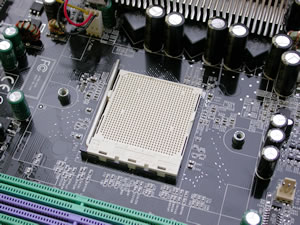
Begin by removing the old cooler and cleaning up any previous thermal compound that may still be on the CPU, making sure you leave no residue or scraps of compound whatsoever. Take note of the stock mounting points which will probably differ from those on Thermaltake's backplate. In that case, you'll have to remove the stock backplate from your motherboard.

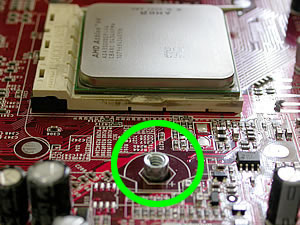
note the stock mounting points will probably differ from those on Thermaltake's backplate...
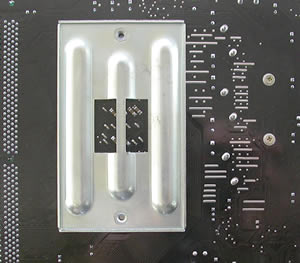
the stock backplate is sometimes compatible with the Blue Orb II
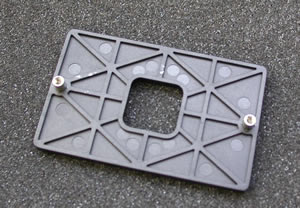
if not, one is included in the retail package...

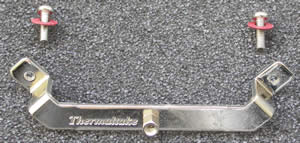
Next step is to use the two screws with which to mount the Thermaltake cooler. This is necessary with AMD based processors...

the screws required with AMD processors...

As soon as you've done this, you're almost finished. Just make sure you use some thermal compound before installing the Blue Orb II.

don't forget the thermal compound...

Last thing, mounting the cooler on the thermaltake brackets, as describe below.

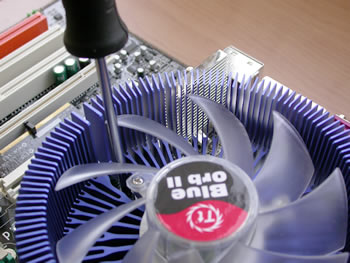
mounting the cooler on the thermaltake brackets...
Exactly as in case with the Golden Orb II

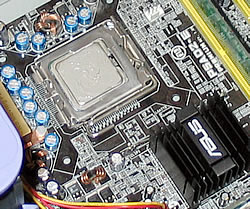
On Intel motherboards, no backplate is needed at all... however you must remove the board from the PC case in order to put the screws on the back.

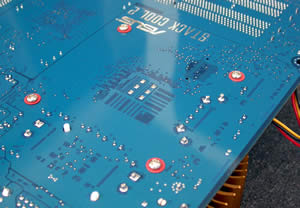
the screws needed for the Intel processors...

As soon as you install the brackets, the rest is easy... almost the same as in case with AMD.

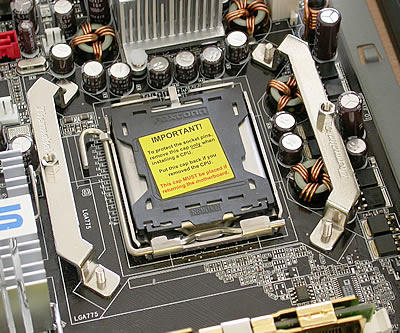
the first installation could prove a little bit harder, more pressure must be applied...

Not much to do now but to plug the 3 pin power connector onto the motherboard and the cooler is all set and ready to work...

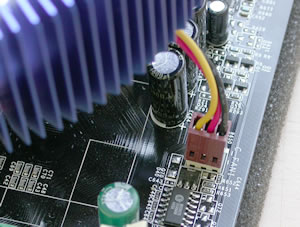
the 3 pin connector...

Noticable volume, don't you think?

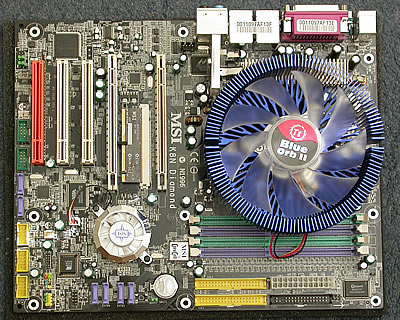
And the outcome of this process...

The blue glow from the fan is really impressive...

A very helpful video at Thermaltake's official website will provide you with further details about the installation process. Find more here.

The installation procedure is simple in the case of AMD platforms, there being no need to replace the back plate. But with Intel 775 platforms, you'll have to remove the motherboard from your PC, something that isn't very convinient. This is something to keep in mind. Notice the most important thing with a cooling system is how efficient it is. Let us check the performance in the following page...


Review Pages

1. Introduction
2. Installation
3. Performance
4. Conclusion


Pages

  • « first
  • ‹ previous
  • 1
  • 2
  • 3
  • 4
  • next ›
  • last »

Thermaltake

Tags: Thermaltake
Previous Post
Plasmon UDO30D-SE
Next Post
Thermaltake Max4

Related Posts

  • Thermaltake Launches AW360/420 AIO Liquid Cooler and WAir CPU Cooler for Workstations

  • Begin the Racing Journey with the Thermaltake GR300 Racing Simulator Cockpit

  • Thermaltake Unveils the Massive EXTREME with Cross-flow Fan

  • Thermaltake Releases the Toughpower TF3 1300W with Support for RTX50 Series GPUs

  • Thermaltake Unveils G6 Direct Drive Racing Wheel Bundle and GM5 3DOF Motion System

  • Thermaltake Launches the TT150 LED Bag in Different Sizes and New Colors

  • Thermaltake New TH V2 Ultra EX ARGB Sync AIO – Snow Edition is Now Available Worldwide

  • Thermaltake Coolers Support New-Gen Intel and AMD CPUs

Latest Reviews

be quiet! Dark Power 14 1000Watt
PC components

be quiet! Dark Power 14 1000Watt

be quiet! Light Base 500 LX
Cooling Systems

be quiet! Light Base 500 LX

be quiet! Pure Loop 3 280mm
Cooling Systems

be quiet! Pure Loop 3 280mm

Dragon Touch Digital Calendar
Consumer Electronics

Dragon Touch Digital Calendar

Soft2bet and the unseen hardware that makes instant play possible
Enterprise & IT

Soft2bet and the unseen hardware that makes instant play possible

Popular News

COLORFUL Introduces CVN B850I GAMING FROZEN Motherboard

COLORFUL Introduces CVN B850I GAMING FROZEN Motherboard

COLORFUL Presents CVN X870 ARK FROZEN Motherboard for AMD Ryzen 9000 CPUs

COLORFUL Presents CVN X870 ARK FROZEN Motherboard for AMD Ryzen 9000 CPUs

COLORFUL Presents the B860 Series Motherboards

COLORFUL Presents the B860 Series Motherboards

Intel-AMD new motherboards announced

Intel-AMD new motherboards announced

TEAMGROUP Launches EXPERT P34F Find My External SSD

TEAMGROUP Launches EXPERT P34F Find My External SSD

ASRock AM5 Motherboards Now Fully Support AMD Ryzen 9 9950X3D & 9900X3D Processors

ASRock AM5 Motherboards Now Fully Support AMD Ryzen 9 9950X3D & 9900X3D Processors

Samsung announces Galaxy Tab S11 and Galaxy S25 FE series

Samsung announces Galaxy Tab S11 and Galaxy S25 FE series

Viltrox Showcases Upcoming Lens Lineup and New TTL Flash at IBC 2025

Viltrox Showcases Upcoming Lens Lineup and New TTL Flash at IBC 2025

Main menu

  • Home
  • News
  • Reviews
  • Essays
  • Forum
  • Legacy
  • About
    • Submit News

    • Contact Us
    • Privacy

    • Promotion
    • Advertise

    • RSS Feed
    • Site Map
  • About
  • Privacy
  • Contact Us
  • Promotional Opportunities @ CdrInfo.com
  • Advertise on out site
  • Submit your News to our site
  • RSS Feed