Media Quality Tests
17. APPENDIX 2. KProbe
Review Pages
2. View Page Description
3. Submission of Tests
4. Submit Tests detailled description
5. List of Tests conducted by a particular reader
6. Empty
7. An example of viewing a test
8. An example of submitting a test
9. Security constraints
10. Csv file format
11. Some suggestions for the proper submission
12. Measuring the quality of recorded media
13. Frequently Asked Questions
14. Glossary of Terms
15. Programming decisions
16. APPENDIX 1. UmDoctor Pro II
17. APPENDIX 2. KProbe
18. APPENDIX 3. CdSpeed
19. APPENDIX 4. PlexTools Professional
APPENDIX 2. KProbe
With this software you can measure the writing quality on both CD/DVD media, the C1-C2 error rates on a CD or the PI/PO levels on a DVD.
It is very simple. Be sure that you are using a LiteOn drive (CD-RW, DVD recorder or CD-RW combo), otherwise you won't be able to use KProbe. Insert the media and open (run) the program. Check the "Write Strategy" tab.

We suggest you to adjust the measurement settings as illustrates below, the first is for DVD and the second for a CD. The "Realtime Chart" is not necessary but you can see in realtime the whole process.


In both the cases of a CD and DVD, it is recommended to to choose the "Disc Size" option. The software will automatically read the whole disc without further adjustments by user. Optionally, the user is able to manually set the measuring margins, by setting the MSF or LBA starting and ending addresses. More information about the MSF and LBA are available in the FAQ section. For submitting your own tests it suffices to choose the whole disc option, provided you have also made the disc full of data during recording.
The selected reading speed is sometimes critical for the reliability of the results. In case of both CD's and DVD's, you can select either to manually enter the reading speed, or check the max speed option. When you select the max option, the software will scan your CD/DVD for errors at the maximum reading speed available by the reader you use. However, testing the same disc at the maximum and a lower speed do not always give the same results. For this reason, we ask users to clearly define the reading speed they have selected for their measurements, during the "Submit Test" page. After all, everyone will be able to compare results with the same or different error scanning speed.
In case of DVD's, the user is able to select the ECC value (1-10). Setting different ECC for each scanning gives different error level values. As in the previous case, keeping the same ECC value for your scannings will give more comparable results.
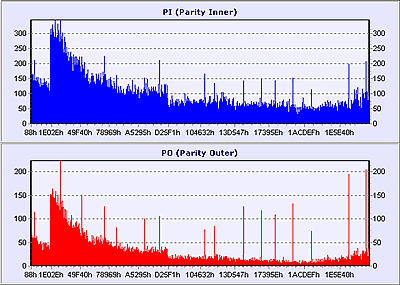
As soon as you press the "Start" button the process will begin. If you have inserted a CD media you will see C1/C2 measurement. Otherwise, with a DVD, you will get the PI/PO errors.
When the procedure finishes, you will see a chart as this one below.

Now, you have to save the results. Just press the save icon, this with the disc on it, and you will be asked to select which chart you want to save. Check both ( as below) and press OK.


Give a short name to the file and set it to .csv type (as you can see in the photo above) so you will be able to use it in the CdrInfo media quality. Press "Save". Please do not use extra periods for the file-name you choose. This will be troublesome during submission of the tests, because there are not allowed more than one periods (for .csv) by our submitting application.
Review Pages
2. View Page Description
3. Submission of Tests
4. Submit Tests detailled description
5. List of Tests conducted by a particular reader
6. Empty
7. An example of viewing a test
8. An example of submitting a test
9. Security constraints
10. Csv file format
11. Some suggestions for the proper submission
12. Measuring the quality of recorded media
13. Frequently Asked Questions
14. Glossary of Terms
15. Programming decisions
16. APPENDIX 1. UmDoctor Pro II
17. APPENDIX 2. KProbe
18. APPENDIX 3. CdSpeed
19. APPENDIX 4. PlexTools Professional


