Thermaltake Matrix
2. A Closer Look

In this page, we will take a closer look at the main features of the MATRIX case, starting with...
1. The front panel. The front of the case is shown in the picture below. The front is like any other case with a small difference. Each of the separate panels or covers for the drive bays, is a mesh and has a thin sponge behind it to filter out any dust that could enter the case. There's a better, close up photo further on showing this. This is indeed needed, especially if the intake fan is installed (which we recommend) helping the air flow from front (intake) to back (outtake). In appearance, it's nothing flashy, but it does the job.

2. The rear panel is a typical design. PSU slot at the top, I/O slots and 12CM exhaust fan in the middle, and expansion slots at the bottom. Note that no PSU is included with the case and must be purchased separately.

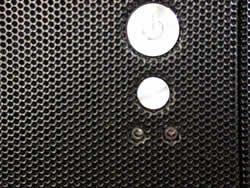
3. On the front panel, you'll find the power and reset buttons, as well as two indicator LEDs. The blue LED indicates when the PC is on and the red for IDE activity. This photo also shows close up, the mesh that makes up all of the front.
4. Of course, the case wouldn't be complete without the Matrix and Thermaltake logos on the front panel on the case.
![]()
![]()
5. A closer look of the dust filters. These are two of the drive bay covers we removed to install two 5.25 devices, a DVD ROM drive and the power supply panel for a Tt PSU. You should be able to make out the spongy material which acts as a filter.

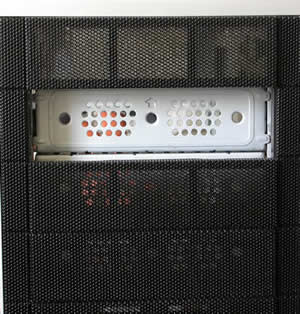
6. The drive bays have by default a metal cover (as seen below) behind the dust covers, except for the very top one. Note that these metal covers cannot be removed unless both side panels on the case are opened. As we will see in the installation procedure later on, each front metal cover has a screw on one side and a tool free clip on the other.
7. The case offers several convenient I/O connections on the side, shown in the image below. There's 1xFirewire, 2x USB and headphone and mic ports.

8. Below we see the cables that connect to the motherboard, for the I/O ports shown above.

9. More cables. These are the usual reset, HDD LED, power LED, power switch and speaker connections from the case to the motherboard..

10. As is common in Tt cases and all latest release cases, the side access panel is fastened in place with thumb-screws for easy removal and installation, without the need for screwdrivers.

11. One of the two side panels on the MATRIX case, has two perforated areas for ventilation. One is located above the CPU and the other, the GPU (graphics card). Note here that the perforations over the CPU can take an 8cm fan.

12. From the photos above and below, we can also see the two spring loaded locks on the the side panel. The thumb-screws discussed above, must be re removed first. The top lock can also be locked with a key.

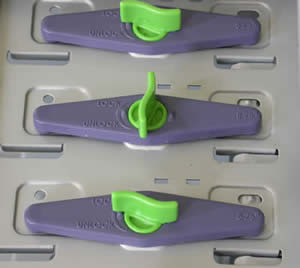
13. The tool free clips are geared mostly for the 5.25" and 3.5" drive bays where HDDs and optical drives are installed. With this method, there's no need for screws and screwdrivers.
 |
| The 3.5'' clips... |
 |
| ...the 5.25'' clips... |
 |
| and the HDD clips... |
14. Tool free clips are also used in the expansion card slots. Again, no screws or screwdrivers are necessary and in a few seconds, anyone can install a peripheral card in their system.

To install a card, pull the green clip up, remove the metal tab occupying the slot, install the peripheral card and close the green clip which pushes down on the card, holding it firmly in place.

15. The MATRIX case provide a number of options for creating an efficient ventilation system. As we already saw, you can install a fan on the front panel which will blow air into the case. Note that in order to install a fan on the front panel, it must be done prior to installing any HDDs or floppy drives.


16. Last but not least, a comprehensive manual is included in the retail box, along with installation screws and a cloth to keep the case polished and shiny.


Now let's move on to the rest of the review and the installation of our test PC in the MATRIX Tt case.