EnGenius ECS2512FP Network Switch
4. Installation/Performance
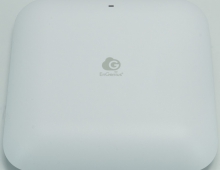
A visual presentation of our network is displayed below. The EnGenius ECS2512FP is connected directly the Internet and power up the ECS230 v3 AP and also gives further local network at the EnGenius Switch 8p.

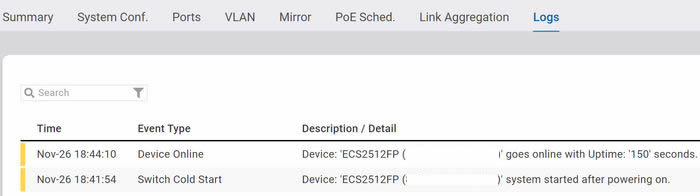
Each EnGenius device has its own control panel that can be used to view various information and of course change settings. There are also logs available for admin to view, like firmware updates etc. You can also turn off the included lights for stealth operation. All EnGenius Cloud devices have one year of PRO features for free. What the Pro functions do? Well they add several important for admin features to make their life easier. In order to activate the one year of free PRO functions you need to head over the Inventory & License, and under the feature plan select from BASIC -> PRO License. You can view here, what he PRO license offers and it costs $50 per device (AP or Switch).
Since the control panel is wide, click at each photo for a larger view. As with all EnGenius devices, users can select/adjust most of its features via the EnGenius Cloud. The device arrived with 1.1.35 firmware and already a newer firmware update was available.

The update procedure can be either manual or automatically at the day/time you decide as an admin. The update process does take some time to complete.

The device has several features to work with, we post below several pictures


We used the EnGenius ECS2512FP network switch with our local network and we tested both its 2.5G and 10G ports. Most currently sold motherboards do support 2.5G network, but for the 10G SPF+ port you need to get a PC card that supports 10G, and the corresponding adapter/cable.
At our local network we had installed the Terramaster F2-422 NAS Server that includes a 10G RJ45 port and the following parts to connect all devices (PC and NAS) to the EnGenius ECS2512FP network switch.
For our tests we used the following parts that worked great with our test setup
- H!Fiber 10Gb SFP+ PCI-E Network Card NIC, Compare to Intel X520-DA1, with Intel 82599EN Chip
- H!Fiber 10G SFP+ RJ45 Transceiver (Cat6a/7, 30 m), 10Gbase-T SFP+ Copper Module for Cisco SFP-10G-T-S, Ubiquiti UF-RJ45-10G
- 10Gtek® 10 Gb/s SFP+ Cable 1.5 Meter, SFP+ Direct Attach Twinax Passive DAC
- CAT 8.1 Network Cable 40 Gbits
- Intel 10G network drivers
First our PC system connected to the EnGenius 10G SPF+ port with the 10GTek SPF+ cable. The PCI-e card must be connected to a PCI-e x8 or 16x port in order to fully initialize 10G speed.

Our Terramaster F2-422 NAS Server also connected via the CAT8 RJ45 network cable and the H!Fiber 10G SFP+ RJ45 Transceiver, also connected at 10G speed!

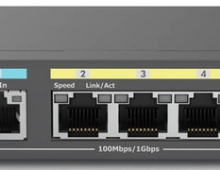
The included network panel also gives you an idea of which devices connected at which port and at what speed (2.5G or 10G)

For transfer tests, we copied a rather big file to from the PC (SSD) to the NAS server (again SSD) that should fully initialize 10G speeds (theoretical ~1.25 GB/s), however the best speed with the Terramaster F4-422 NAS server would be maximum 550MB/sec due to SATA3.3 connection interface. If our NAS server had support for NVME probably we would be able to reach full speed.
Let's now test this theory. So we copied through the EnGenius ECS2512FP Network Switch a single 25GB file from an internal NVME, through the 10G port to the Terramaster F4-422, which supports two disks both in SATA interface. In the first slot we had a WD Ultrastar DC HC550 16TB HDD and at the second a Crucial MX500 4TB SSD, both drives with the latest firmware available. Using the TerraCopy software we saw almost maximum performance for both the HDD and the SSD disks.
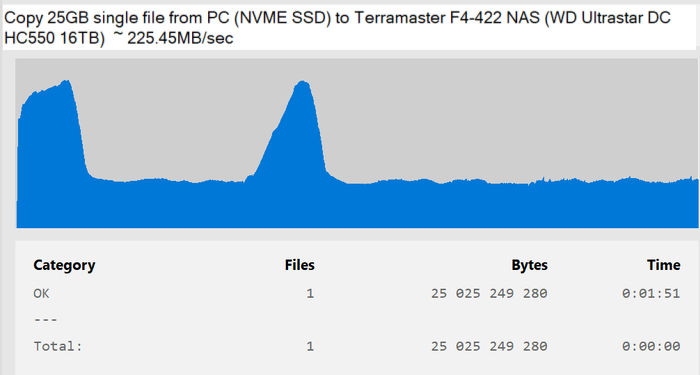

If we had the chance to test a NAS server with a NVME SSD installed, performance would reach ~ 1.0G/sec, very close to the 10G specifications.