Breaking News

Power Your World with DJI's New Portable Power Station Power 2000 G.SKILL CAMM2 DDR5 Memory Module Demonstrates DDR5-10000 Overclock Speed on ASUS Z890 Motherboard JCB Phone Launches New Rugged Smartphone Range to Power Global Expansion Sharkoon announces SKILLER SGK50 Wood Series TAMRON announces Ultra Wide-Angle 16-30mm F2.8 G2 Zoom Lens

logo

  • Share Us
    • Facebook
    • Twitter
  • Home
  • Home
  • News
  • Reviews
  • Essays
  • Forum
  • Legacy
  • About
    • Submit News

    • Contact Us
    • Privacy

    • Promotion
    • Advertise

    • RSS Feed
    • Site Map

Search form

Spire DigiPanel II

Nov 17,2005 0

2. Installation


Review Pages

1. Introduction
2. Installation
3. Our Tests
4. Conclusion


As mentioned in the specs earlier, the dimensions of the SP-206 DigiPanel II are 148.4 x 42.4 x 69.2 mm, making the device installable in any 5.25" drive bay. Screwing the Panel on the case is quite easy, identical to that of a normal 5.25" drive. After mounting the panel on the 5.25" drive bay, we connected the available cables to the appropriate positions inside the case for monitoring the temperature and fan speed.

Let us first have a look at the inside of the panel and each pin separately.

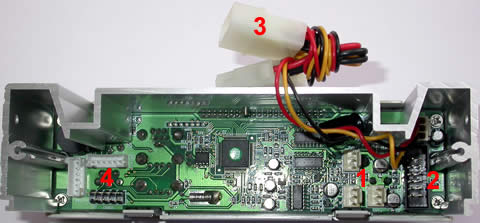
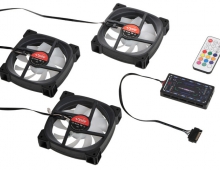
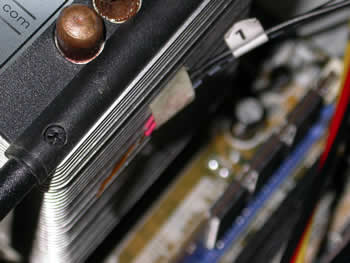
1. Fan slots. Here, we connected the fan cables with the CPU-Case-GPU fan cables inside the case. The slots are numbered as 1-2-3 respectively, indicating their monitored area when functioning the DigiPanel.
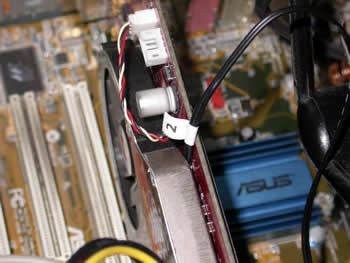
2.Sensor slot. Here we hook on the sensor cable which results in three different thermal sensitive tips for temperature monitoring.
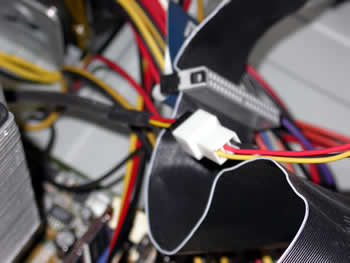
3.Power Cable. This cable provides power to the Digipanel which is connected to a power supply cable and bridges with an expansion slot to circulate the power to another device, which in our case was a DVD-RW drive.
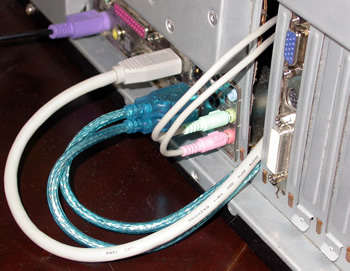
4.USB-1394-Earphones-Mic slots. From these connections, the cables run all the way to the back end of the case and into the appropriate connections.

the power cable connecting the DigiPanel with the power supply...

From here on, the installation was easy. We placed the sensor cables at the appropriate positions (note here that the CPU sensor cable is not to be put under the heatsink as is suggested by the heatsink manufacturers).

With the accompanying thermal straps that come with the DigiPanel II, we placed the CPU sensor near the CPU heatsink fins, while we placed the second one near the GPU heatsink of the graphics card. The third was not used.

The temperature readings we got were not 100% accurate, while they differ by 8°C from the reported CPU temperature measurement taken with the SpeedFan utility. Let us say here that the sensors are quite sensitive and will react to any temperature differences occurring.

For the needs of this review, we used only two temperature sensors and one fan cable, that of the CPU fan.

Next, we put the rest of the cables (USB-1394-Mic-Earphones) through the case, to the motherboard connectors at the back of the case...

After installing all cables and booting the test PC, we went on to set the threshold for the alarm temperature and the low speed fan alarm.

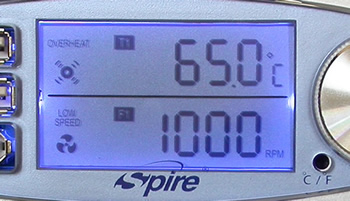
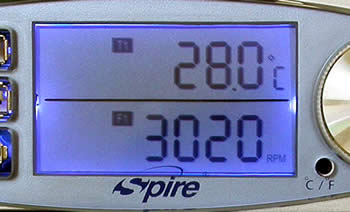
The temperature upon booting was at 28.0°C while the CPU fan was at 3020rpm.

The installation procedure was finished without too much trouble, as the cables were easy to connect, and monitoring started as soon as the PC had been powered up.

Having completed the installation, lets move on to the next page were we test the USB and FireWire ports.


Review Pages

1. Introduction
2. Installation
3. Our Tests
4. Conclusion


Pages

  • « first
  • ‹ previous
  • 1
  • 2
  • 3
  • 4
  • next ›
  • last »

Spire

Tags: Spire
Previous Post
Thermaltake Silent Water
Next Post
NEC ND-4551A

Related Posts

  • Spire Unveils Cutting-Edge ARGB Cooling Fan Set: A 25-Year Legacy of Excellence in PC Cooling

  • Introducing Spire’s New Ergonomic Workstations and Desk Peripherals

  • SPIRE PC announces EagleForce series 80PLUS certified

  • Spire Thermal Stone Keeps Your Hands Warm

  • Spire Thermal Eclipse II review

  • Spire Previews Coolers For The Upcoming Intel 1156 Core i5 Platform

  • Spire PowerFuse

  • Spire MegaPodIII

Latest Reviews

Crucial T710 2TB NVME SSD
PC components

Crucial T710 2TB NVME SSD

be quiet! Pure power 13M 750W
PC components

be quiet! Pure power 13M 750W

JSAUX 65Wh Rog Ally Battery
Gaming

JSAUX 65Wh Rog Ally Battery

Introducing PriceHub
Enterprise & IT

Introducing PriceHub

Viltrox AF 50mm F2.0 Air
Cameras

Viltrox AF 50mm F2.0 Air

Popular News

COLORFUL Announces the Launch of the CVN Z790D5 ARK FROZEN Motherboard

COLORFUL Announces the Launch of the CVN Z790D5 ARK FROZEN Motherboard

AsRock, NZXT, Biostar and Gigabyte announces X870 motherboards

AsRock, NZXT, Biostar and Gigabyte announces X870 motherboards

COLORFUL Introduces CVN B850I GAMING FROZEN Motherboard

COLORFUL Introduces CVN B850I GAMING FROZEN Motherboard

COLORFUL Presents the B860 Series Motherboards

COLORFUL Presents the B860 Series Motherboards

COLORFUL Presents CVN X870 ARK FROZEN Motherboard for AMD Ryzen 9000 CPUs

COLORFUL Presents CVN X870 ARK FROZEN Motherboard for AMD Ryzen 9000 CPUs

COLORFUL, AsRock, NZXT, MSI announce Intel Z890 Motherboards

COLORFUL, AsRock, NZXT, MSI announce Intel Z890 Motherboards

Intel-AMD new motherboards announced

Intel-AMD new motherboards announced

COLORFUL Presents the COLORFIRE B650M-MEOW WIFI Motherboard, Supports AMD Ryzen 9000 Series CPUs

COLORFUL Presents the COLORFIRE B650M-MEOW WIFI Motherboard, Supports AMD Ryzen 9000 Series CPUs

Main menu

  • Home
  • News
  • Reviews
  • Essays
  • Forum
  • Legacy
  • About
    • Submit News

    • Contact Us
    • Privacy

    • Promotion
    • Advertise

    • RSS Feed
    • Site Map
  • About
  • Privacy
  • Contact Us
  • Promotional Opportunities @ CdrInfo.com
  • Advertise on out site
  • Submit your News to our site
  • RSS Feed