Shuttle DH310S mini PC review
3. Installing the components, BIOS settings
Review Pages
2. Opening the box
3. Installing the components, BIOS settings
4. CPU tests
5. GPU tests
6. Audio and video tests
7. Summary
We are ready to install the essential components to the device. We begin by flipping the barebone upside down in order to remove the two screws that keep the chassis's cover in place. Then we unfastened the rack mount screw and removed the rack.

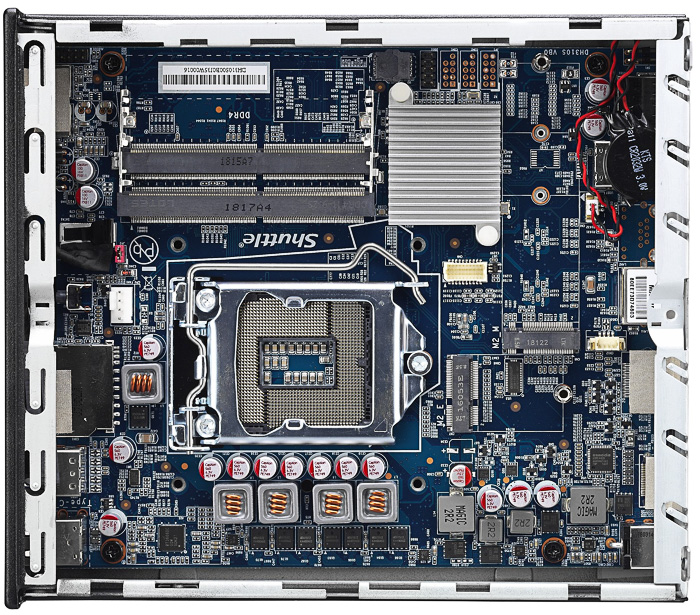
Below you see the layout of the mainboard. Identify each compartment and install the corresponding components:

CPU and ICE Module Installation
- Unfasten the four ICE module attachment screws and unplug the fan connector
- Remove the ICE module from the chassis and put it aside
- Unlock and raise the socket lever.
- Lift the metal load plate on the CPU socket.
- Οrientate the CPU correctly and align the CPU notches with the socket alignment keys. Make sure the CPU sits perfectly horizontal, then push it gently into the socket.
- Tear off the protective membrane from the metal load plate. Close the metal load plate, lower the CPU socket lever and lock in place.
- Spread thermal paste evenly on the CPU surface.
- Screw the ICE module to the motherboard. Note to press down on the opposite diagonal corner while tightening each screw.
- Connect the fan.
Memory installation
The DH310S supports 1.2 V DDR4
- Locate the SO-DIMM slots on the motherboard
- Align the notch of the memory module with the one of the relevant memory slot.
- Gently insert the module into the slot in a 45-degree angle.
- Carefully push down the memory module until it snaps nto the locking mechanism.
- Repeat the above steps to install an additional memory module, if required.
Μ.2 Device Installation
- Locate the M.2 key slots on the motherboard
- Install the M.2 device into the M.2 slot and secure with the screw.
HDD or SSD Installation
- Place an HDD or SSD in the rack and secure with the our screws from the sides.
- Slide the rack back into the chassis and refasten the screws. Connect the Serial ATA and power cable to the HDD or SSD.
Below you can see an internal view of the barebone with the cpu, the memory, the NVME SSD installed. The optional WLAN module (M.2-2230) featuring two external antennas for IEEE 802.11ac and Bluetooth 4.0 is also visible:
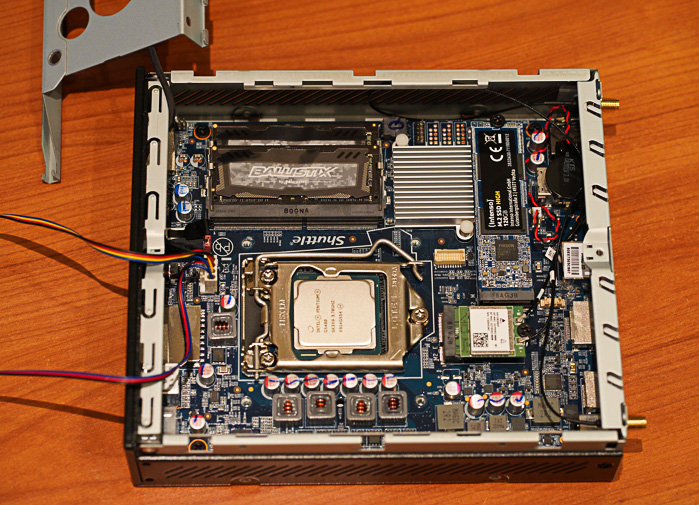
Installing the cpu heatsink is easy. All you need to do is to fasten the four pre-mounted ICE module attachment screws. You may also need to make some room for the cables of the Wifi antennas in order to keep everything tidy:

Shuttle suggests that the DH310S should be usually operated in a vertical position, using the supplied feet (DisplayPort output facing up). Another option is to use the VESA mount: The device is mounted behind a monitor using the supplied VESA mount kit. From a thermal point of view, the horizontal operation is permitted, although there are no rubber pads on the device. In that case, the maximum operating temperature of the device is limited to 35°C.
Bios and Windows installation
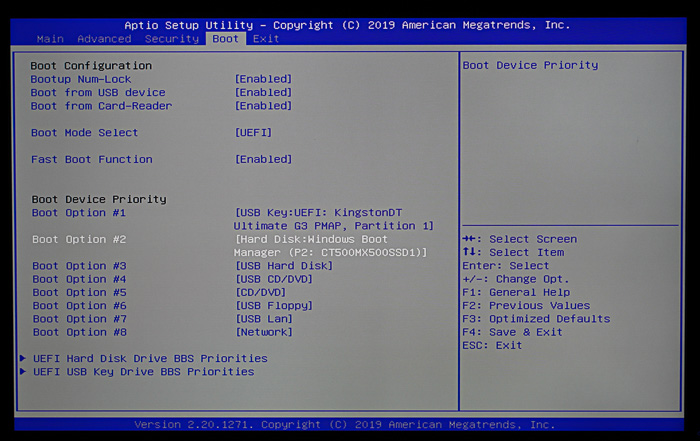
You can choose to install Windows 10 (64bit) or your favorite Linux distro (like Ubuntu). We choose the Windows 10option and created a Windows 10 USB flash drive. The next step is to boot up the device, enter the BIOS (pressing del at boot screen) and select the USB as a boot device. The installation was completed some minutas later all the installed components were recognized without requiring any additional drivers. Of course it is suggested to install the drivers found at Shuttle's support website .
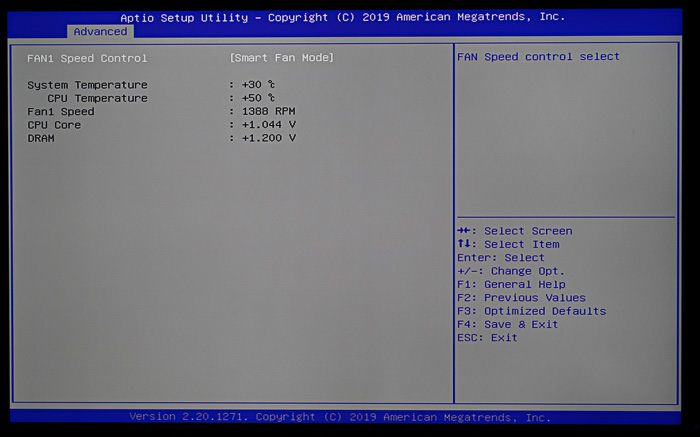
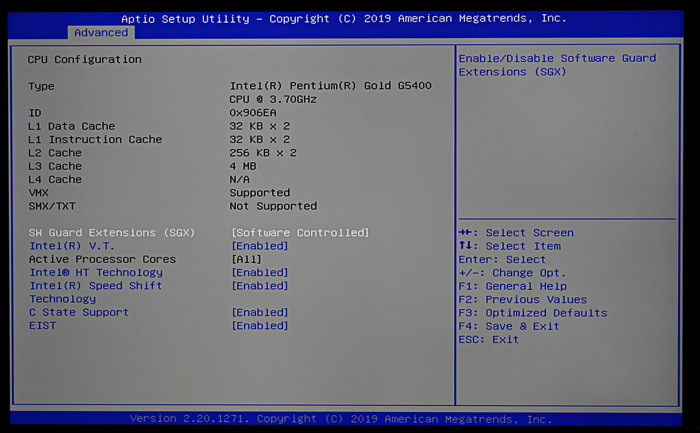
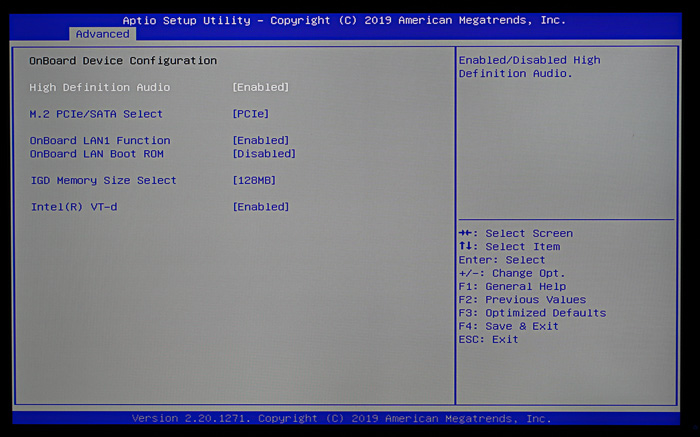
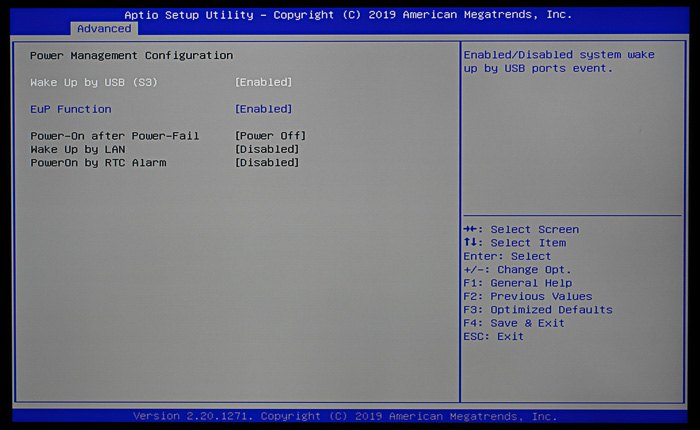
The system is uses an American Megatrend Inc (AMI) BIOS and its rather easy to navigate/walk around. Below you see the latest available bios (v1.04):


Review Pages
2. Opening the box
3. Installing the components, BIOS settings
4. CPU tests
5. GPU tests
6. Audio and video tests
7. Summary