Primera Inscripta Thermal CD Printer
2. Package/First Impressions
Review Pages
Primera Inscripta Thermal Printer - Page 2
Package/First Impressions
- Unpacking:
 Among
with the main unit, our special package included:
Among
with the main unit, our special package included:
- Power Adapter and Power Cord
- Printer driver and software
- Black monochrome and blue/black ink ribbons
- Warranty statement and registration card
- Quick start guide
Let's take a look at the main printer
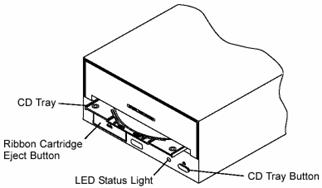 On
the front you can see the CD tray button which opens or closes the CD tray for
loading and ejecting CDs. The button also is pressed and held while power is
applied in order to perform a self-test. Also, the printer can be reset while
unit's power is on by pressing and holding this button.
On
the front you can see the CD tray button which opens or closes the CD tray for
loading and ejecting CDs. The button also is pressed and held while power is
applied in order to perform a self-test. Also, the printer can be reset while
unit's power is on by pressing and holding this button.
The Ribbon Catridge eject button is pressed to remove the ribbon catridge for ribbon replacement.
The LED status light indicates that power is ON. It is solid when
the printer is busy processing data, blinks slowly when it is requesting a new
CD, and blinks fast to indicate an error, such as the ribbon is out, wrong ribbon
installed, tray movement error, tray lift error or memory error.
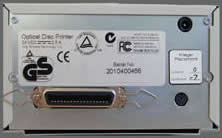
 On
the back there is the parallel interface port for Windows-based PC connection.
The printer's auxiliary control is for OEM connection to an autoloader or robotic
duplication system to control tray in / out and other printer functions.
On
the back there is the parallel interface port for Windows-based PC connection.
The printer's auxiliary control is for OEM connection to an autoloader or robotic
duplication system to control tray in / out and other printer functions.
Above the auxiliary control there is the Image Placement values
label. These values must be entered into the vertical and horizontal boxes during
the Tab calibration option. These values have been optimized specifically for
each printer during final assembly and allow images to be centered on a CD when
printed.
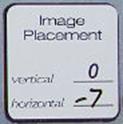 The
printer provided worked best with the adjusting values shown on the left. The
vertical value was "0" and the horizontal "-7"
The
printer provided worked best with the adjusting values shown on the left. The
vertical value was "0" and the horizontal "-7"
Review Pages