Primera Composer - Signature III
6. Composer CD Duplicator
Primera Composer/Signature III System - Page 6
Composer CD Duplicator
- Installation:
The system is connected to the SCSI card through a short length, SCSI cable
(50pins high density) to the PC. You will also use the -included- serial cable
and connect the system in the serial port. This needed for controlling the robotic
arm movements. The build-in recorder is the well-known PleXWriter
PX-W1210S SCSI CDR-W drive (firmware 1.00). After the initial setup we installed
the latest 1.01 firmware revision for the PX-W1210S and we were ready to start
own mini CD duplication/printing factory!
You can upgrade the Composer system with ANY SCSI CDR-W drive, as long the included software -Prassi PrimoCD Pro- supports it. In other words when PX-W1610S or Sanyo CRD-BP5 is out can make an upgrade and boost up the recording speed up to 16x-24x! However for our testing proposes we didn't tried to upgrade the drive since the issue here was how the Composer performs with the basic setup. Also the screws that hold down the Plextor PX-W1210S were very tightened screwed!
- Hardware:
 If
we take a closer look in the inside (check left picture) you will notice the
big card which control the recorder, the robotic arm and the recorder it self.
The various cables are well tightened up and the whole structure seems very
complete. As we said earlier if you ever decide to change your recorder you
will face some very tighten screws. Heh..let's continue our internal view.
 The
robotic arm is placed upon a vertical screw companioned in a plastic column
in the center of the Composer. The arm can move up and down
  and
left to right with the proper electric motors (check right picture). The end
of the arm has another mechanism, which grabs the CDs by their center hubs (check
left picture). However the arm cannot pickup 8cm CDs or mini CDs. Last the robotic
arm makes a lot of noise so if you over-do it your neighbors will start knocking
at your door..
 In
the top of the system you will find 3 places in which you put the included Bins.
The package comes with 2 plastic Bins, which hold up to 50 CDs. You just place
them in the proper position and you are ready to start duplicating
 In
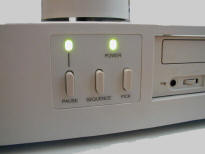
the front of the Composer you will notice the big "Composer" logo
and 2 led (Power and Pause) and 3 buttons:
 -
Pause: It stops the motion of the robotic arm. It can also be used with other
buttons to perform other operations (reset, error-clearing..)
- Sequence: Moves the robotic arm from one position to the next. You will probably
use it for testing proposes during the setup (as we did).
- Pick: It used to pick up manually a disc and drop it in the bin, the recorder,
the printer or in the reject area.
In the back of the drive you will find:
 -
Power connector: It gives the system electric power.
- Serial connector: It connects the system with the PC (either COM 1 or 2) in
order control the robotic arm (and the printer) from the software.
- SCSI connector: It connects the system externally with the SCSI controller.
and the mini din plug for using it  with
the Signature III CD printer. Also you will find several holes, which are used
for attaching the base of the Primera CD printers (Signature III). Last there
is an open hole for additional fun, which however is not placed by default.
Maybe if you plan to use at high temperature environment you should add it.
 Last
there is the reject area in where the system drops all the CDs, which don't
pass the software verification test or just happened to be coasters! The robotic
arm will just drop the CD in the front of the system. There for example you
could have some kind of bag to gather all those bad CDs (hope you haven't lot
of them!).
In the above picture you can see the whole Composer/Signature III system ready to operate!


