ASUS CT-479
2. Installation
- Installation
What we need for the installation is a screwdriver and some patience, especially if your motherboard does not have the latest BIOS release. You need to do download the latest BIOS revision using the Asus Updater and then install it with the same utility. After the process is completed, you can safely move on to removing your CPU and installing the CT-479 adapter.

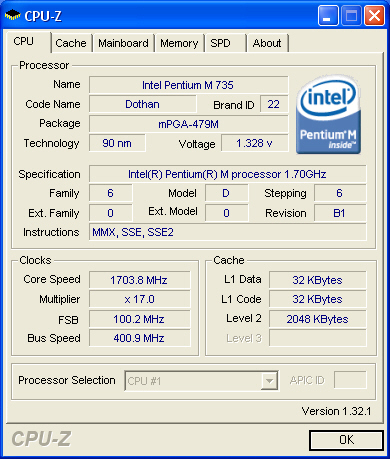
At the time we carried out this review of the adapter, the latest BIOS revision for our motherboard was v1011. Here are some screen shots from CPU-Z for our Pentium M CPU (which we used with the adapter once it was installed) and P4P800SE motherboard.

After you're through with the BIOS update, you can start installing the adapter. There are several steps involved, but if you are careful and patient, all should go well.
1. First, remove the original CPU and of course, clean off any thermal compound left in the CPU mounting area...

2. Now take the adapter and place it in front of you on a flat surface, so you can install the M series CPU on the adapter...

3. You will notice that the Adapter has a screw that locks the CPU in place, preventing it from moving.. You may also notice that the Adapter (or parts of it) are manufactured by FOXCONN, as labeled on the CPU holder...

4. Fasten the CPU onto the holder with the aid of a flat screwdriver. Make sure you fasten it in, but don't apply too much pressure and damage the unit.

5. In the image below, you can see the adapter mounted in the motherboard's CPU socket. Now that the adapter and CPU are in place, we can proceed with the installation of the cooler and power cables.

6. Normally, this step is not required as the thermal compound is already on the cooler. But if you ever have to remove and re-install your adapter, you'll have to apply thermal compound on the M CPU, just as you do with standard CPU installations.

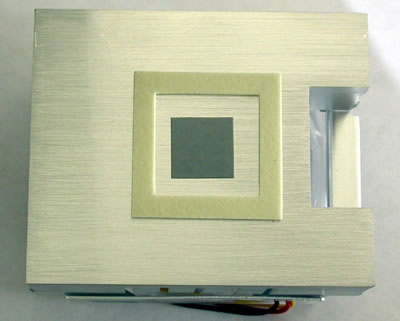
7. As already stated, there's a thermal compound pad already on the cooler by default, and all the user has to do, is remove the protective strip off the cooler to reveal the compound as shown in the photo below.

8. In the following screenshot, we can see the copper base with the thermal compound for the cooler, included in the Adapter CT-479 bundle.
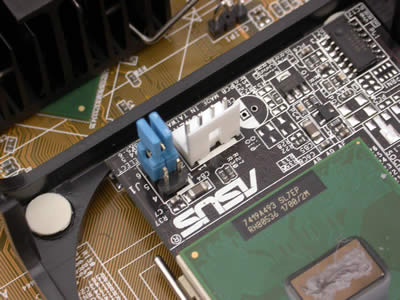
9. Next, is the power supply input (for the cooler) and the FSB jumpers, which as previously discussed, can be configured by the user for 400MHz or 533MHz FSB frequency.
10. We then plug in the power cable for the adapter and mount the cooler. Note here, that this is not necessary plug in the power cables at this point, since they can be connected after the cooler has been mounted.

11. Almost done. The cooler is mounted on the CPU (remember to remove the protective strip off the bottom side of the cooler protecting the thermal compound). Once the cooler is in position, use the two retention clips to fasten and secure it to the adapter..

12. Both ends of the retention clips are fastened likewise.

13. Up and ready. In only a few minutes, we managed to complete the installation, without too much hassle. The hardest part is probably updating the BIOS on your motherboard.

Having completed the installation of the CT-479 Adapter, we move on to see how it performs and compare it with the Intel P4 2.8 Prescott CPU.