Breaking News

ASUS Announces ProArt Router PRT-BE5000 and ProArt Switch PQG-U1080 CORSAIR Expands the Popular FRAME Series Case Lineup DeepCool Launches the LT360 VISION ARGB Noctua and Asetek Announce Flagship AIO Liquid Coolers Toshiba Begins Sampling of 30-34 TB SMR Nearline Hard Disk Drives

logo

  • Share Us
    • Facebook
    • Twitter
  • Home
  • Home
  • News
  • Reviews
  • Essays
  • Forum
  • Legacy
  • About
    • Submit News

    • Contact Us
    • Privacy

    • Promotion
    • Advertise

    • RSS Feed
    • Site Map

Search form

Stellar SpeedUp Mac Software Review

May 18,2021 0

2. Installing The Software


Review Pages

1. Introduction
2. Installing The Software
3. Getting familiar with GUI - Page 1
4. Getting familiar with GUI - Page 2
5. Conclusion


The software can be found for free at the Stellar's website. The procedure requires from you to submit the "Fill the Registration Form to Get the 30 Days Free Software". Once done, you will receive an email from Stellar Data Recovery containing the SpeedUp Mac download link and activation key. We downloaded the latest v4.0.0.2 revision.

To install SpeedUp Mac, follow the steps below, it’s not hard at all.:

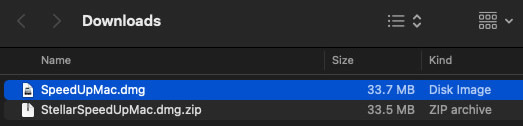
1. Unzip the SpeedUpMac.dmg.zip file.

2. Double-click the dmg file. This will mount a virtual volume – SpeedUpMac.

3. Drag the SpeedUpMac application from the mounted virtual volume to the Applications folder.

4. To launch the software, double-click on SpeedUpMac in the Applications folder.

5. Accept the License Agreement and then the main window of SpeedUp Mac software is displayed.

To remove the software simply drag and drop SpeedUpMac from the Applications folder to Trash.

If you are running macOS Mojave (10.14) or higher, you need to enable Full Disk Access on your Mac to ensure SpeedUp Mac works correctly.

Full Disk Access permission is a new privacy feature introduced in macOS Mojave (10.14) that prevents some applications from accessing your important data, such as Mail, Messages, Time Machine, and Safari files. This means you need to manually grant permission for certain applications to access these protected areas of your Mac. In earlier versions of macOS (10.13 and lower), this permission is automatically granted during the installation of SpeedUp Mac software. If Full Disk Access is not enabled, your SpeedUp Mac is unable to scan all areas of your Mac. This means SpeedUp Mac can only scan a limited portion of your system folders and hard drive, potentially resulting in unnecessary clutter remaining on your Mac. This procedure also is described at the Stellar SpeedUp MAC website but we will sum it up for you:

1. Click on Apple icon from the top left of your screen. Open System Preferences and select Security & Privacy > Privacy tab > Full Disk Access

2. Security & Preferences window appears with Full Disk Access option selected. Click on the lock icon.

3. Use your Touch ID (if available) or enter your system administrator credentials and click Unlock.

4. Click +

5. Click Applications, then select SpeedUp Mac, and click Open.

6. If prompted, click Quit Now. Your SpeedUp Mac now has Full Disk Access to scan and protect your Mac. Note: You need to restart SpeedUp Mac, if running, for the changes to take effect.


Review Pages

1. Introduction
2. Installing The Software
3. Getting familiar with GUI - Page 1
4. Getting familiar with GUI - Page 2
5. Conclusion


Pages

  • « first
  • ‹ previous
  • 1
  • 2
  • 3
  • 4
  • 5
  • next ›
  • last »

Stellar

Tags: Stellar
Previous Post
Software vs Hardware Raid
Next Post
bequiet! Silent Base 802 Midi Case Review

Related Posts

  • Stellar Data Recovery For Mac

Latest Reviews

In the Age of AI Phishing, the Best User Experience Might Be the One That Feels Safest
Enterprise & IT

In the Age of AI Phishing, the Best User Experience Might Be the One That Feels Safest

SoundPeats C30
Consumer Electronics

SoundPeats C30

Why Streaming Live Casino Games Demands Smarter Tech
Enterprise & IT

Why Streaming Live Casino Games Demands Smarter Tech

Kioxia Exceria Plus G3 512GB microSD
Cameras

Kioxia Exceria Plus G3 512GB microSD

SoundPeats Cove Pro
Consumer Electronics

SoundPeats Cove Pro

Popular News

TEAMGROUP Launches EXPERT P34F Find My External SSD

TEAMGROUP Launches EXPERT P34F Find My External SSD

Samsung announces Galaxy Tab S11 and Galaxy S25 FE series

Samsung announces Galaxy Tab S11 and Galaxy S25 FE series

Viltrox Showcases Upcoming Lens Lineup and New TTL Flash at IBC 2025

Viltrox Showcases Upcoming Lens Lineup and New TTL Flash at IBC 2025

CORSAIR announces Vanguard Pro 96 and Vanguard 96 Gaming Keyboards

CORSAIR announces Vanguard Pro 96 and Vanguard 96 Gaming Keyboards

Panasonic Introduces the First Ultra-Telephoto Zoom Lens in the LUMIX S Series

Panasonic Introduces the First Ultra-Telephoto Zoom Lens in the LUMIX S Series

MSI Launches DATAMAG 40Gbps Magnetic Portable SSD

MSI Launches DATAMAG 40Gbps Magnetic Portable SSD

MSI Launches FORGE GK600 TKL WIRELESS Special Edition Compact Mechanical Keyboard

MSI Launches FORGE GK600 TKL WIRELESS Special Edition Compact Mechanical Keyboard

Viltrox Joins the L-Mount Alliance, Expanding Creative Possibilities

Viltrox Joins the L-Mount Alliance, Expanding Creative Possibilities

Main menu

  • Home
  • News
  • Reviews
  • Essays
  • Forum
  • Legacy
  • About
    • Submit News

    • Contact Us
    • Privacy

    • Promotion
    • Advertise

    • RSS Feed
    • Site Map
  • About
  • Privacy
  • Contact Us
  • Promotional Opportunities @ CdrInfo.com
  • Advertise on out site
  • Submit your News to our site
  • RSS Feed