Thermaltake Blue Orb II
1. Introduction
![]() Thermaltake, is one of the best known manufacturers of PC cooling solutions and PC case modding among other things. Even though the company was founded in the late 90's, 1999 to be specific, it has managed to become one of the top brands in cooling solutios, with all of their products providing solutions for many "thermal" problems. In this review, we will be taking a closer look at the latest cooler, the "Blue Orb II" which is compatible with both 775 and AMD K8 sockets.
Thermaltake, is one of the best known manufacturers of PC cooling solutions and PC case modding among other things. Even though the company was founded in the late 90's, 1999 to be specific, it has managed to become one of the top brands in cooling solutios, with all of their products providing solutions for many "thermal" problems. In this review, we will be taking a closer look at the latest cooler, the "Blue Orb II" which is compatible with both 775 and AMD K8 sockets.


The cooler consists of a Copper Core and 140 Aluminum Extruded fins, with a 12cm sized fan spinning at 1700 RPM, producing a maximum 77.85 CFM (Cubic Feet per Minute) airflow.
 |
| Air Flow |
 |
| Heat Tranfer |
The reason for maintaining low temperatures as we can imagine, is not only the fan but also the 140 Aluminium Fins, which occupy the largest part of the Heat Sink.
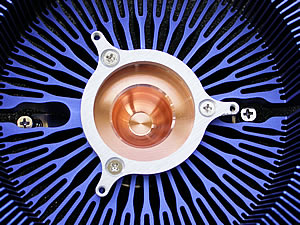 |
| Removing the fan, we can take a closer look at the copper base and fins... |
Features...
 |
Patent Radian Crotched Fin - |
 |
Copper Core Construction- |
 |
Silent Blue LED Fan- whispering 17dBA |
 |
Massive Aluminum fin count:140fins - maximizes heat dissipation area. |
 |
12 cm Ultra Quiet Cooler |
 |
| The Blue led fan, giving a nice look to the case... |
Specifiactions
| Product name | CL-P0257 |
| Heatsink Dimension | 140mm X 66mm |
| Heatsink Material | Copper Core & Aluminum Extrusion (140 fin) |
| Fan Dimension | 120mm X 24.3 mm |
| Rated Voltage | 12V |
| Started Voltage | 7V |
| Power Input | 3.00W |
| Fan Speed | 1700±10% RPM |
| Compatibility | Intel Pentium D (Socket LGA775) Intel Pentium 4 (Socket LGA775) Intel Celeron D (Socket LGA775) AMD Athlon X2 (Socket 939) AMD Athlon 64 FX (Socket 939 / 940) AMD Athlon 64 (Socket 754 / 939) AMD Sempron (Socket 754) AMD Opteron (Socket 940) |
| Max.Air Flow | 77.85 CFM |
| Max.Air Pressure | 1.80 mm H2O |
| Noise | 17dBA |
Lifetime |
30,000 Hours |
| Connector | 3 Pin |
| Weight | 869g |
There are many sockets that the Blue Orb II is compatible with. As Thermaletake declares, this is a great solution for the new Dual Core processors.
 |
| The rear view of the Thermaltake fan. |
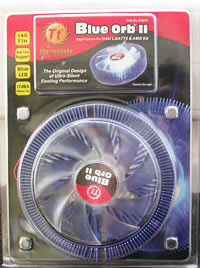
The retail package, apart from the cooler also includes all the necessary parts in order to installed on AMD and Intel sockets.
As for the installation procedure, it's described on the next page...