1. Page 1
NERO EXPRESS - Page 1
 Ahead
Nero is definitely one of the most powerful burning software available in the
market. The company has added enough features to fulfill any burning need of
the user and additionally continues the further development of the software
to eliminate any weakness that could lead to a problematic operation. However,
the more features are added, the most complicated the software becomes, and
the provided flexibility of the operations turns out to be a headache for the
beginner, as he faces the numerous settings applied before burning.
Ahead
Nero is definitely one of the most powerful burning software available in the
market. The company has added enough features to fulfill any burning need of
the user and additionally continues the further development of the software
to eliminate any weakness that could lead to a problematic operation. However,
the more features are added, the most complicated the software becomes, and
the provided flexibility of the operations turns out to be a headache for the
beginner, as he faces the numerous settings applied before burning.
This thought made Ahead engineers to work on Nero Express, the new "light"
and user friendlier version of the well known Nero Burning ROM. The idea is
to make sure that the user will easily select the right settings for each burning
process, and proceed to recording within a few -step process. The interface
of Nero Express is re-designed and differs from the original Nero, without however
to lose any anything in terms of integrity and functionality. Nero Express is
mainly focused for OEM bundling in which users need an easy to use and understand
software.
STARTING UP
The following picture is the first window that comes up after firing Nero Express
up. On the right you should select among the recorders available in your PC
and to start a project, you should simply move your mouse pointer to the menu
on the right, make your selection and click.
The menus (burning actions) are divided into five categories. You can choose
between burning data, music, videos/pictures, copy entire disc, or burn a disc
image or a saved project.


In the bottom of all the windows there are the "Nero" and the "More"
buttons. The "Nero" button switches to the powerful user interface
of Nero, which gives access to more features and options. Your current project
you will be automatically transferred to Nero, and this option is available
in all the Nero Express windows. However, the OEM version of Nero Express will
not have the button to switch to the main Nero product. Probably this will take
you to Nero web site, but not initially in the first version.
The "More" button is visible in all the Nero Express windows and
contains the "Configure" button, the "Save tracks to HD"
option, the "Erase Disc" and "Disc Info" options and the
"Cover Designer" button.
The "Configure button" is nothing but the preferences tab you can
find in Nero. So is the "Disc Info" and "Erase disc" buttons,
applied to the media inserted to the drives. The "Cover Design" button
links to the Nero Cover Design software.
2. Page 2
NERO EXPRESS - Page 2
DATA BURNING
The choices for Data burning are two, to create a data disc and a data and
audio CD. (CD-Extra).
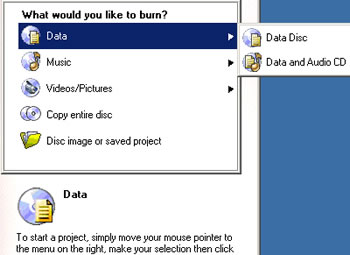
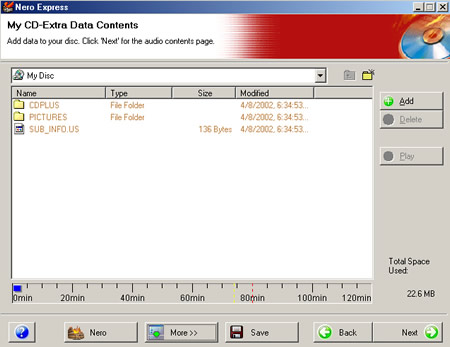
We choose Data Disc and proceed to the second window in order to add the compilation
files.

The "More" button on the bottom of the window allows user to make
date and time settings for his new CD.

If you choose to burn a Data and Audio disc, you are firstly requested to add
the data contents with the usual add window or with drag & drop from Windows
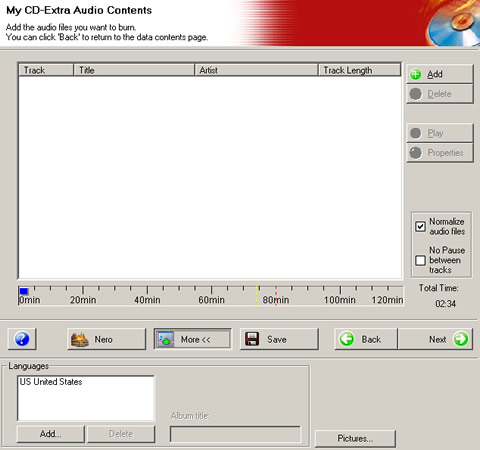
Explorer, and then you can add the audio files.
In the audio files window, there are two more choices on the right, the "normalize
audio files" and the "No pause between tracks" options. Also.
In the "More" button there is a language selection list box and of
course a picture button, which allows you too add any pictures on the CD-Extra.
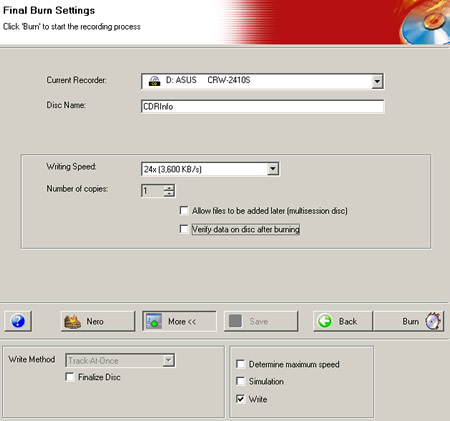
Our CD is ready for burning. The next window has the final burn settings. You
can choose the recorder, the writing speed, and the number of copies. Options
such as Multisession and data verification after burning are there and the "More"
button allows you choose the write mode (DAO or TAO), simulation or straight
writing process. You can also let the software to determine the maximum writing
speed by checking the appropriate box in the same tab.
After a successful burning, you can ask the program to save a detailed log
file about your PC configuration and of course the burning details of the process.
You can also print these details easily with the "print" button:

 If
you press the next button, you see the following picture that asks you how you
want to continue, with a new or an existing project, or even to exit the application.
If
you press the next button, you see the following picture that asks you how you
want to continue, with a new or an existing project, or even to exit the application.
The final version of Nero Express will also incorporate the bootable CD creation
option.
3. Page 3
NERO EXPRESS - Page 3
MUSIC BURNING
Let's burn our favorite music to a CD. The choices here are to make an Audio
CD, an Audio and Data CD, an MP3 disc or a WMA disc.

As it is well known, you can create a standard audio CD that will play on all
CD players. You can make a compilation from music on your hard drive or select
tracks from existing audio CD's. MP3 and WMA files will be automatically converted
to audio CD format during the burn process.
The next step is to add the audio files to burn. The supported audio files
are *.wav, *.vqf, *.mp3, *.aif and *.cda. The compilation is ready for burn,
and the final burn settings window comes up with the normal writing speed and
other basic settings. In this part you can add some CD Text in your CD and you
can also remove the silence at the end of *.cda tracks.
In case you select an Audio and Data CD, the produced CD will contain both
music tracks and computer tracks. Music is recorded on the first track so that
standard CD players will play your songs and ignore the computer files. The
PC will see both types of files.
As we have already mentioned, you firstly select the data files and then the
audio tracks of your compilation, and then you make the final burning settings
and burn.
To burn MP3 or WMA files, you just add the appropriate files to your compilation
and burn them as in the previous cases.
4. Page 4
NERO EXPRESS - Page 4
VIDEO/PICTURE BURNING

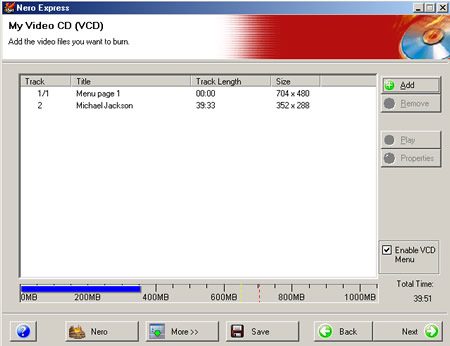
To create a Video CD you have to choose the Video CD menu and add the source
video files you want to burn. The video files will be automatically converted
to VCD compliant MPEG-1 files during the burn process.
Then you can change the look of the menu in the following window.
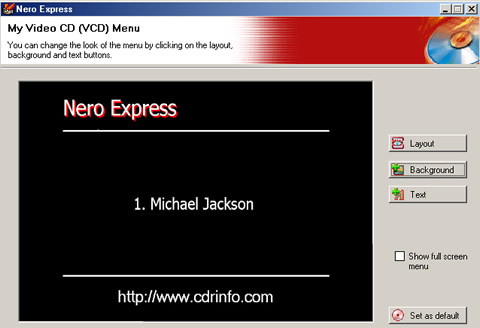
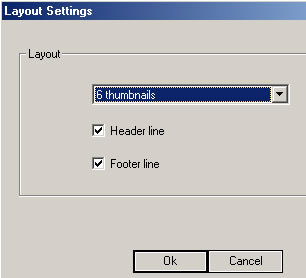
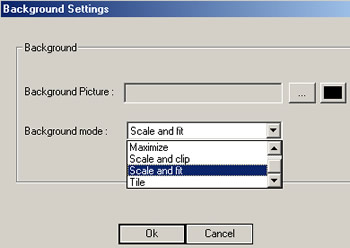
The layout, background picture/color and the text can be changed, through the
easy to use setting tabs on the right side of the window.

The burn settings window is the same as in the other cases.
To make a Super Video CD (SVCD) you do the same process as with the Video CD.
Have in mind that unless you have installed the MPEG-2/SVCD Plugin, the video
files you will add will not be automatically converted during the burn process
and they have to be in SVCD compatible MPEG-2 format.
The final version of Nero Express will also fully support DVD video mode for
writing. The pre-release version we have in our hands currently does not support
it.
5. Page 5
NERO EXPRESS - Page 5
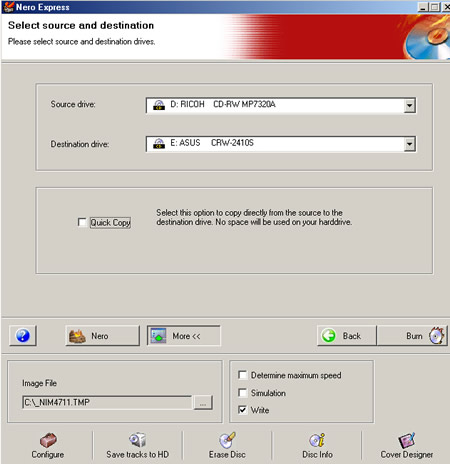
CD COPY
To copy your CDs is a 3-step procedure. You select the copy entire disc menu,
and in the next window you make the source and destination drive selection,
among with the copying options, (on the fly or not), simulation or writing.
CONCLUSION
Nero Express is a user-friendly burning application that has not lost the validity
of the main burning machine, Nero Burning ROM. The interface is simple and the
wizard like design smoothly guides the user to the next step, without the need
of any additional complicated explanations. Nero Express prefers to give the
essential steps one after the other than in a single window, making the software
lighter and easily accepted from the inexperienced user.
The application is based upon the original Nero and this could work as a guarantee
of good operation for some users. We believe that Ahead made a good choice with
Nero Express and the packet would be the ideal burning solution for CD-RW drive
packages and OEM bundlings.