1. Features, specifications
We have in our labs the Shuttle the KS10, an entry-level NAS storage solution. The one-bay network attached-storage device is suitable for storing files (e.g. documents, music and photos) on the local network, for location-independent data backup or for setting up your own private cloud. It accepts 3.5" hard disks up to at least 4 Terabytes and has further USB ports for external storage devices and printer. Devices connected by USB cable as well as memory cards in the built-in SD card reader can be shared over the network

OMNINAS KS10 is equipped with a Marvell 88F6707 800MHz SOC and 256MB DDR3 Memory. Its read/write speed reaches up to 80MB and 60MB per second. In addition to Gigabit LAN, the KS10 features built-in IEEE 802.11 b/g/n wireless network and supports AP mode.
The KS10 not only has data storage and backup capacities but it also supports multiple server functions for FTP, DLNA and iTunes, BT download, and the free OMNINAS App. Also on board are functions such as Wake-On LAN, energy-efficient Ethernet and a scheduler for NAS operating time. Fanless and low-power consumption (less than 6 W in standby mode and 12 W during normal operation) design ensures the KS10 is passively cooled and quiet for long-term operation. Lastly, its LEDs can be switched off for unobtrusive use in the home.
- Specifications
| CPU |
Marvell 88F6707 800GHz |
| HDD |
3.5" HDD |
| OS |
Linux |
| Largest single HDD capacity supported |
over 4TB |
| DRAM |
256MB DDR3 |
| NAND |
1Gb |
| USB 2.0 |
x2 |
| Card Reader |
SD, SDHC and SDXC flash memory cards
Supports Auto-Copy function |
| 10/100/1000 Ethernet |
YES |
| RTC |
YES |
| Power Adaptor |
- External 40W AC/DC power adapter (fanless), 19V / 2.1A
- AC Input: 100~240V AC, 50~60Hz
- Automatic voltage adjust
|
| Power Consumption (Standby/Operational) |
5.8W / 11.9W |
| Performance (Read/Write) MB/s |
80/60 |
| Max. # of users |
256 |
| Max. # of share folders |
256 |
| Max. # of concurrent connections |
256 |
| LED Indicators |
Power/Status button, HDD, USB devices, Card Reader |
| Alarm Buzzer |
YES |
| Reset Button |
YES |
| Power Button |
YES |
| Secure lock |
YES |
| Operation Temperature |
0 - 40 ˚C |
| Fanless cooling system |
The System shuts down when the hard disk temperature exceeds 65 °C / 149°F. |
| Certification |
CE, FCC, C-Tick, BSMI, CB, EuP Lot6, R&TTE |
| Chassis |
Plastic |
| Size |
124mm (H) x 60mm (W) x 205mm (L) |
| Weight |
550g |
| Accessories |
Power Adaptor (40W), AC Power Cord, Ethernet Cable, CD, QSG |
| Secure lock 10/100/1000 Ethernet |
IEEE 802.11 b/g/n |
| Wireless Support |
AP mode |
| Supported OS |
Microsoft Windows XP and above, Mac OS and Linux |
| Mobile Device Access |
iPhone, iPAD, Android phone, Android tablet |
| Supported Mobile OS |
iOS 4.2 and above, Android 2.3 and above |
| Mobile Device Application |
App Store for iPhone & iPAD, Google Play for Android phone & tablet |
| Supported Browser |
IE 8.0 or later, Firefox 3 or later, Safari 3 or 4 and Google Chrome |
| Languages |
12 (English, GErman, French, Russian, Dutch, Spanish, Italia, Danish,Turkish) |
| File System |
- Internal : XFS
- External: EXT2, EXT3, EXT4, XFS, NTFS, FAT, FAT32
|
| LAN Configuration |
- DHCP/Static IP
- Auto IP
- Hostname/Group name
|
| Networking Services |
- Samba Server (File sharing)
- DHCP client
- USB Storage devices sharing
- Printer Server
- iTunes Server
- Twonky DLNA Media Server
- Apple File Protocol (AFP)
- NTP for time synchronization
- FTP/SSL FTP Server
|
| Backup |
- Quick Copy for USB Storage devices (USB Storages to NAS)
- Time Machine support
- NAS to USB Storage backup
- NAS to NAS backup
- Memory card to NAS
|
| Scheduling |
- Schedule backup
- Schedule for NTP time synchronization
|
| Remote Access |
- Remote Access by Internet Browser
- Remote Access by Smartphone / TabletWake on Lan
|
| Disk Management |
- HDD Spin-down timer
- Single disk
- Check Disk
- Disk usage status management
- Disk Format
- SMART information report
|
| Download |
BT Download without PC
(schedule download, tasks download, download configuration, etc.) |
System Requirements
|
- Workstation OS: MS Windows XP SP3, Mac OS X 10.4, Apple Safari 3.0,
Linux kernel 2.6.x or later
- Smart phone OS: iOS 4.2, Android 2.3 or later
- Browser: MS Internet Explorer 7.0, Firefox 3.x, Google Chrome, Apple Safari 3.0 or later
- Router for Internet connection
|
| System Setup/Tools |
- On line Firmware upgrade
- Time-Zone Settings
- Wizard and installer for easy setup
- NAS Discovery tool (Finder to search/connect/map drives)
- Factory Reset
- System log
- Schedule on/off
- Power Interrupt auto resume
|
2. The device
The Shuttle KS10 retails for about €80 (excluding VAT 23%).
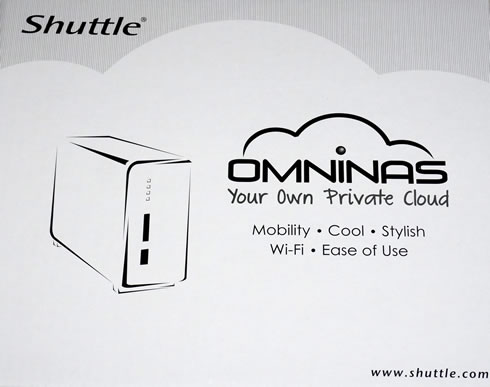
Below you see a picture of the KS10's retail box, which is rather simple and includes the Shuttle and OmniNas logos at the front informing you what this product is about.
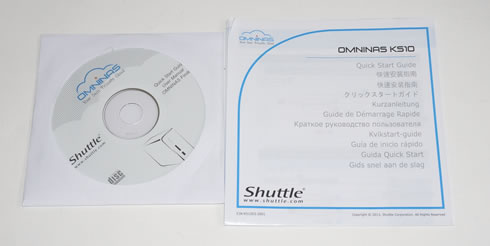
Everything is well packaged inside:
- The KS10 product
- 1x Power Adaptor (40W)
- 1x AC Power Cord
- 1x Ethernet Cable 1.50m
- 1x CD
- 1x Quick Setup Guide

The KS10 NAS server is small in size at 124mm (H) x 60mm (W) x 205mm (L) and its weight is 500gr weight.
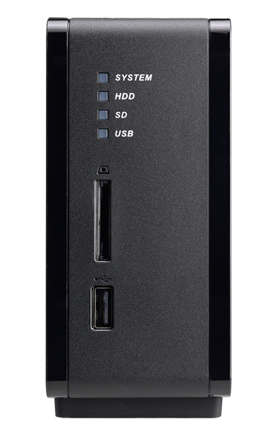
Below you see the front view of the device. There are four blue LEDS (Status LED, HDD,SD,USB), a card reader that supports the auto copy function and a USB 2.0 port.
The rear side includes a power button, USB2.0 port, an 1Gigabit ethernet jack, a reset button, a K-Lock security slot and the DC input.
All six LED indicators with the following behavior:
- System LED: dual color (operating mode/error: blue/red)
- HDD LED: dual color (access/error: blue/red)
- SD card reader LED: single color (access: blue)
- USB LED: single color (access/connect: blue)
- LAN speed LED (10/100 Mbps: green, 1000 Mbps: orange)
- LAN activity LED (access/link: blinking green)

At the bottom side there are two large rubber pads to keep the device in place, and a sticker with information about the product. As you also see below, the passively-cooled device also features some essential ventilation slots:

Overall the Shuttle KS10 looks good and solid, despite its all-over plastic cover:

OK, let's use the device. The first thing to do is to install a hard drive in the OMNINAS before you can
begin using your storage device. All you need to do is to press the release button at the top side of the device to open and remove the bay cover:

You should be now ready to install either 3.5" or a 2.5" HDD up to 4TB single drives. Insert the HDD into the bay with its connectors going in first.Once its's secured in place, put the bay cover back.


3. Setting up the NAS server
The device settings are made through a web browser on a computer, which is connected to the same local subnet. 12 languages are supported: English, German, French, Spanish, Italian, Dutch, Danish, Russian, Turkish, Chinese (simple+trad.) and Japanese.
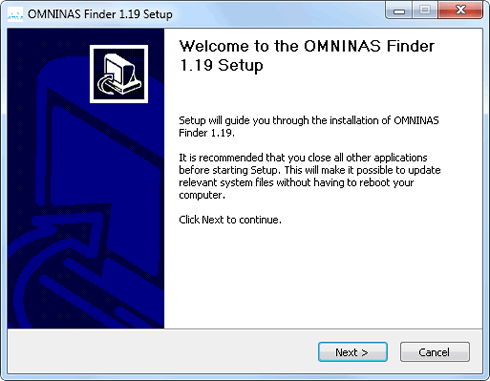
The OMNINAS Finder Software Tool is used to detect the OMNINAS system in the local network (within the same subnet). It can start the Web User Interface in your default browser and can map/unmap the connected internal and external storage devices to a drive letter of your PC.
You can also use an App to upload and share files from iOS and Android devices like iPhone, iPAD, Android phone and Android tablet.
Just lock for the appropriate "OMNINAS" app on one of these websites:
Android: https://play.google.com/store/apps/details?id=com.shuttle.omninas2
iOS: http://itunes.apple.com/nz/app/omninas/id543929833
The OMNINAS must be configured and set up before use. You can either connect the device to a switch/router, or directly to a PC/laptop
In any case, connect the power adapter to the device. We start by connecting the NAS to our network router .Shuttle is offering the Finder application in order to easily connect OMNINAS (Windows and Mac users only). The Finder utility is used to detect devices on the local network (same subnet) or to directly
access your device through a web browser (IP address 169.254.100.200).
The software will soon recognize the KS10. From now on, you'll be able to directly
access your device through a web browser (IE, Chrome or Firefox depending your OS). A similar utility for MACs is also available as well.
The OMNINAS Finder application starts and displays all the detected devices within your
network subnet. Here you can also map network drives to your local network (installed at the KS10 NAS server) in order to be accessible for other users.

The OMNINAS Wizard is your guide to initializing and setting up your OMNINAS device. Afterwards, you should enter into the web menu of the KS10 server via a browser -- in our case we entered the IP address that was automatically assigned to the device by the connected router.

The setup process is rather straightforward and everything comes in a logical order Below you see the various settings you can make during the set up. Of course, any of these settings can be further adjusted later though the KS10 server menu.
Select the language and time zone from the drop-down menus:


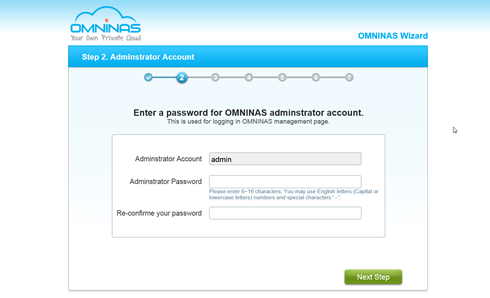
In the Administrator Account prompt, type in a password for the admin account:
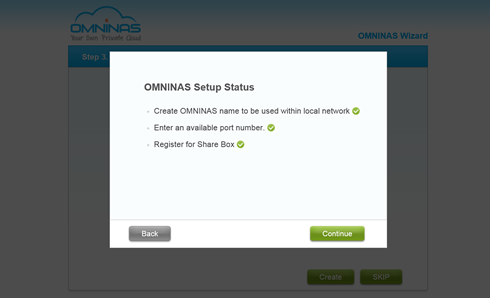
In the Create OMNINAS prompt, enter a name to designate your OMNINAS device. The
name must be 6 to 18 characters long.
Once your device is named, the Internet status field displays the status of your network
connection. If you are connected, your Share Box account registers successfully to the
Share Box server. Enter the name to designate your OMNINAS and click Create.
The Share Media Files prompt follows:

You can turn on the Media Server and iTunes
Server at this time to share your files:

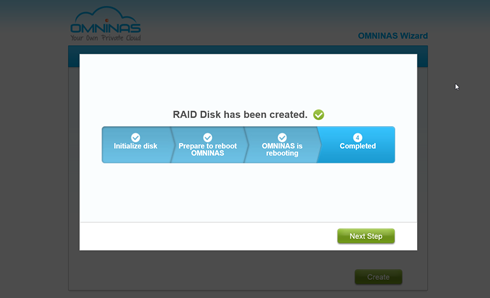
The RAID disk function opens:


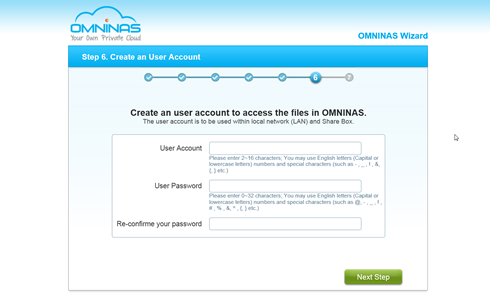
The User Account setting displays. In the user account field, enter a new account name to
add.In the User Password field, enter a password associated with the account name above:
That's it! The setup of your OMNINAS device is complete.
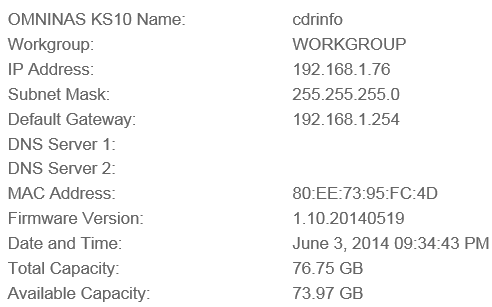
The OMNINAS name as configured is displayed as well as the name of the administrator
and user accounts:

4. Menus, settings
After getting to the last point of the setup process you can get into the deeper menus via the web interface. These menus are accessible using a any browser (IE, Firefox, Chrome, etc..) either from a PC or a portable devices. If the OMNINAS is configured to use DHCP, the IP address is assigned by DHCP. Make
sure the OMNINAS and the computer connected to it are under same subnet.
If the OMNINAS is connected directly to a PC or Laptop, the default IP address will be used
(169.254.100.200).
You need to enter your admin password to log on:

The OMNINAS Web Interface allows you to configure your personal settings through a web
browser. The Interface includes access to Settings, Storage, Share, USB, Backup, BT Download,
Share Box and Media Service. You can use the Interface to manage your devices from a local or
remote access in the same subnet group.
From there you can also restart or shutdown the device, change the language (up to 12 languages):

The Settings menu includes access to Wi-Fi, Network, Date & Time, General, About, Log, Factory
Reset, Firmware Update, and FTP Server. You can use the Interface to configure your settings
from a local or remote location in LAN:

The OMNINAS provides wireless connectivity as an Access Point (AP). By setting up the OMNINAS as an AP, your wireless devices (PC/notebook or smartphone) can connect to the OMNINAS.
Through the Wi-Fi settings, you can enter a Wi-Fi SSID, encryption method (WEP 64 bits, WEP 128 bits, WPA, WPA2 and WPA-mixed), a Wi-Fi password, the Wi-Fi band (B/G, G/N, B, G, or N) and the channel width.
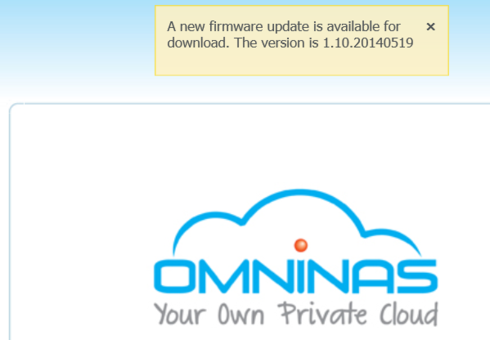
In our case, new firmware update was found and we easily installed it, as you see below:


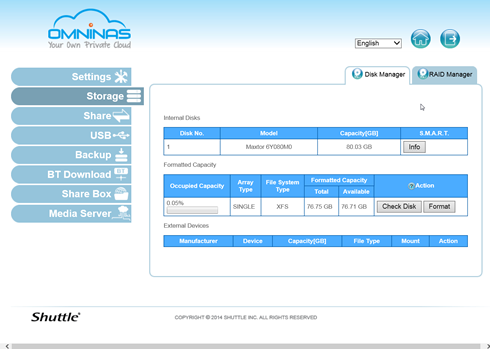
Moving on with the menus, the Storage menu displays disk information and status (active, failed, mirroring and mount or unmount
an external drive) for all internal or external (USB) drives.It displays the available disk capacity and you can scan, repair, and format (XFS file system) the system disks.You can also mount, unmount, and format (EXT2, EXT3, EXT4, XFS, FAT16, FAT32, and NTFS) external devices:
At the Share menu you can add public or private folders. You se a list of available folders, and you can edit and delete them. Here you can also
add user profiles:

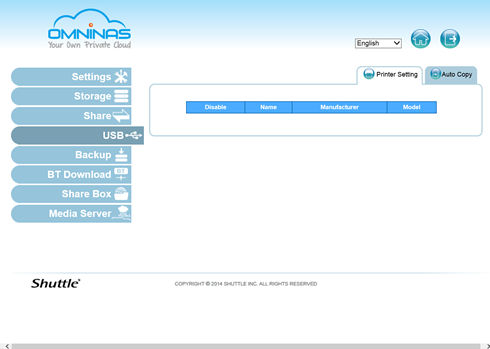
The USB menu displays status information for connected printer devices. You can also enable or disable auto copying function to an SD card or an external (USB) device.

The Backup menu includes the Backup Log , which displays a history list of executed backup events. You can create and schedule backup events from a selected source file to a target external
or second OMNINAS device.
Through the BT Download menu , you can enable or disable the BT Download function. You are free to set general and specific downloading settings (always, scheduled), select files to upload, set preferences, download and upload rates, and manually
control the download functions:

Through the Share Box menu settings you enable or disable remote sharing function through the omninas.net host servers:

And finally, through the Media Server menu, you can enable or disable the media server and iTunes server functions; and enable or disable the iTunes Server. Enabling the function allows all iTunes
clients within the same subnet to access music files within the OMNINAS iTunes
folder.

5. Final words
The compact KS10 proved to be a friendly choice for media streaming and local cloud storage. We could easily upload files to the NAS either via a PC/MAC via copy/paste functions or even through the included FTP server.
The NAS has both UPnP and iTunes media servers enabled by default, so all you need do is copy your audio and video files on to the NAS and you'll then be able to stream them from any computer or console on your network.
The KD10's streaming performance is good enough to send HD video to a PC elsewhere on your network, although the transfer speeds are not the fastest you can find. Through a local network (1Gbit), we measured 60mbps and 50mbps reading/writing -- a performance close to what Shuttle quotes. Of course, make sure that the HDD you have installed can take advantage of the provided bandwidth. In addition, we initially installed
an older HDD, but the internal temperature of the NAS raised rapidly after a while and the device's protection system kicked-in to automatically shut down the server. So it could be better to install NAS-rated HDDs.
You can also use the built-in 801.11b/g/n radio that supports both client and hot-spot modes, allowing you to reduce the number of dedicated devices required on your networks. However, the Wi-Fi is limited to the 2.4GHz band and a maximum throughput of 54Mb/s.

The device also supports two USB devices (one at the front and one at the back port), meaning you can use USB enabled devices, like a printer, to make them accessible over the local Wifi network. Pretty handy feature. There is the possibility to auto-copy the SD files to the NAS server, again very handy for users who might need it.
The KD10's simple web interface includes a BitTorrent client, so you can leave your NAS downloading (legitimate) music and videos distributed as torrents. Unfortunately there's also no way to search torrent listings sites. You can also set up the OmniNAS KD20 as a web-accessible Share Box, a personal remote cloud storage device that's made available by registering it as a subdomain of omninas.net.
The included DLNA server, can be useful for users who wish to distribute digital media over their local network, either in DLNA -enabled TVs or gaming systems. The procedure is very simple - just copy the files to the NAS server and set the interval for server to re-scan for media files. There are several Android Twonky apps for such use, so you should look over the App Market and test what you feel suits most for your needs.
The device can also be scheduled to either shut down/reboot/ or wake-on lan.
We found not many features missing from the KS10. Of course adding an XMBC server to the player would have much better results for media sharing fans but the included Twonky server takes the job as well. And while Shuttle offers several other more advanced NAS products, we feel that the Shuttle KS10 is a smart solution for for anyone ready to build a NAS server. It doesn't cost a great deal and it is very easy to use, despite its multiple settings menus.
The Positive
- Screw-free Installation Design
- User-friendly Menu
- Good file transfer performance
- iTunes/Printer/FTP Server
- Ability to download Torrents
- Online firmware update
- Onboard Wifi (Hotspot) function
- Two USB2.0 and SD ports
- Fanless design
- Schedule on/off & Wake on LAN
- DLNA Media Server-Twonky
- Ability to share Printer over local network
The Negative