1. Features, specifications
 Thermaltake is one of the most popular PC case manufacturers around the world. The company offers several lines of products for everyone; for the mid-user who needs a well-built case for its PC system as well as for demanding gamers and power-users.
Today we present the Element V, a PC case armed with optimized airflow characteristics, 5 pre installed heavy-duty fans and also enough space to even install three larger fans for extra cooling.

The case features two 120 mm front mounted fans, which are blowing outside air directly through and over the drive bays. An additional oversized 230 cm ColorShift fan is found at at the side panel, responsible for taking in a vast amount of outside air and distributing it over graphics cards and CPU. Two more exhaust fans in the upper area remove uprising hot air; one 120 mm rear side TurboFan and one big size ColorShift fan in the top panel.

For users you like a vivid look and enjoy giving their case a character of it’s own, the three ColorShift fan provide with 6 color options that can be or in motion. Adjustment of the three ColorShift fans’ color scheme and fan speed are conveniently done by a dual-function know on the top front side. The dimensions of 532 (H) x 220 (W) x 537 (D) cm provide for plenty of room for high-end and power setups. The Element V can house 12 drive bays of which five are 5.25", six for 3.5" and one for 2.5" devices. High peripheral connectivity is warranted through the implementation of four USB 2.0, one eSATA and HD connectors at the very front of the top panel.

Built for ATX, EATX and MicroATX motherboards, the Element V full-tower places standard PS2 power supplies on the bottom of the case. For more advanced cooling demands or overclocking enthusiasts, punch-out holes for water cooling are reserved in the rear panel. And for those who have to frequently cool down their thirst, special holes at the left panel give you the option to install a water bottle cage. The Element V full-tower chassis is available at a suggested retail price of US $170..

- Features
- Color shift Fan with 6 color changing pattern for optimal gaming experience
- Three color shifting fans creates most eye catching appearance
- Adjustable fan speed control for performance mode or silent mode
- Ventilation - Excellent thermal performance with optimized air flow
- Support up to 11X5.25" drive bay or 5X5.25" and 6X3.5" with 2 iCage.


- Specifications
|
|
| Case Type |
Full Tower |
| Material |
SECC |
| Front Bezel Material |
Plastic |
| Color |
Black |
| Side Panel |
solid w/23cm side fan |
| Motherboard Support |
Mini ATX
Full ATX
Extended ATX |
| Motherboard Tray |
No |
| 5.25" Drive Bay |
5 |
| Ext. 3.5" Drive Bay |
|
| Int. 3.5" Drive Bay |
6
With Additional 1 x 2.5" HDD / SSD bay |
| Expansion Slots |
7 |
| Front I/O Ports |
USB 2.0 x 4,
HD Audio ports,
eSATA x 1 |
| Cooling System |
Front (intake) :
120 x 120 x 25 mm Colorshift fan (900/1200rpm,17dBA, 35.01/46.67 CFM)
120 x 120 x 25 mm Turbo fan (1400rpm,17dBA, 46.67 CFM)
Rear (exhaust) :
120 x 120 x 25 mm Turbo fan (1400rpm, 17dBA, 50.0 CFM)
Top (exhaust) :
200 x 200 x 20 mm silent Colorshift fan (600/800rpm, 14dBA, 49.735/65.3 CFM)
200 x 200 x 20 mm x 1(optional)
VGA (exhaust) :optional
50 x 50 mm fan x 2
Side (intake) :
Plug & Play 230 x 230 x 20 mm Colorshift fan (600/800rpm, 14dBA, 57.0/76 CFM) |
| Liquid Cooling Capable |
Yes- Supports 1/2” , 3/8” , 1/4” water tube |
| Liquid Cooling Embedded |
No |
| Power Supply Supported |
Standard ATX PSII(optional) |
| Power Supply Included |
No |
| Dimension (H*W*D) |
532 (H) x 220(W) x 537(L) mm
20.9(H) x 8.7(W) x 21.1(L) in |
| Net Weight |
14.13 kg
31.15 lb |
| Security Lock |
|
| Application |
|
2. Opening the package
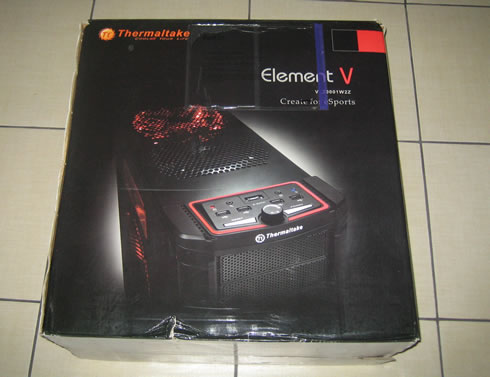
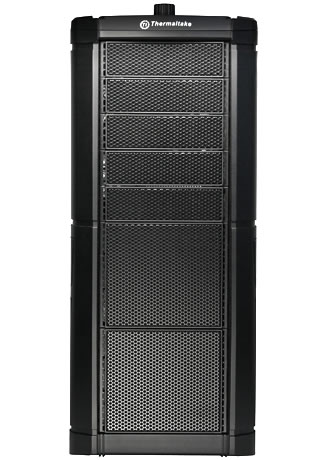
The Thermaltake Element V is a full-tower case and as such, it retails in a huge box . The retail cost is around $170 depending your region and included taxes. The case's great design appears on the front side of the retail package:
Inside the box, the Thermaltake Element V is well-packaged and kept in place with two compact Styrofoam spacers. The package also includes a manual, a warranty card and several other useful tools and accessories, including many screws enough to install up to 11 devices into the case:
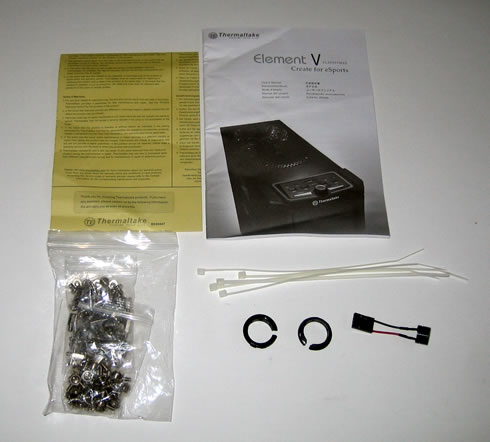
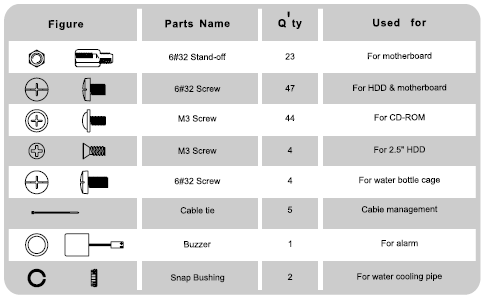
Here is what you will find in the package in detail:
The full black-colored case is made out of solid steel, which means it is rugged but heavy as well. According to its specifications, the Thermaltake Element V weighs14.13kg without any components installed. This means that the total weight of the ready-to-use PC could easily reach the 20kg. Regarding its size, the case is conveniently sized at 532 (H) x 220 (W) x 537(L) mm - large enough to cover your needs.
The manual also mentions that the the total height of the cpu cooler that you will use shouldn't be more than 155mm, while the height and the length for your graphics cards should be less than 335mm. These limits should not be a problem for you. For example, the Nvidia GTX 480 measures 267mm, while the ATI HD 5970 holds probably the record with a length of 309mm. That means you can easily add even the longest graphics cards to your Thermaltake Element V case.

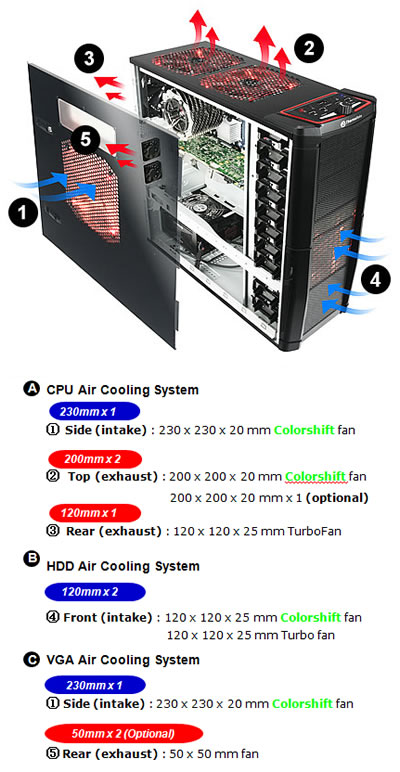
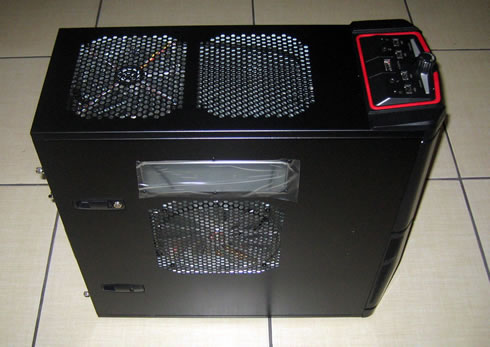
As you can see in the picture below, the Thermaltake Element V has many fans! At the top we will find a 200mm fan installed and there is also an option to install a second one! At the left side panel there is a 230mm intake fan. The front side includes two 120mm intake fans, and an additional a single 120mm is placed at the rear side to blow out hot air from the case.
If that isn't enough, Thermaltake is also offering the option to add two additional 50mm exhaust fans at the rear side:
Our initial thought was that the case would sound like a factory with all these fans spinning. However, we could barely hear noise coming out of the box. And even if this noise is still annoying to your ears, the fan speed controller found on the top panel is available to adjust the RPM of the fans and the produced noise:

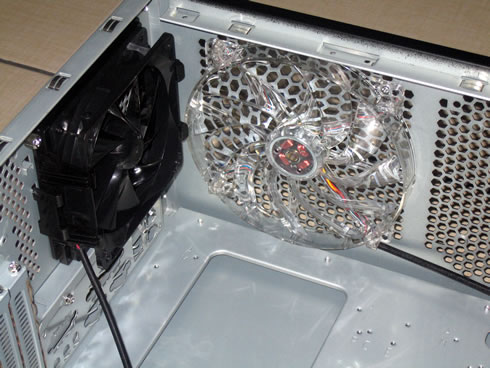
Below you see an internal view of the rear and top fans:
Here are the front 120mm intake fans:

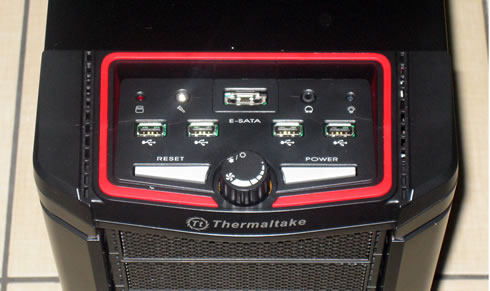
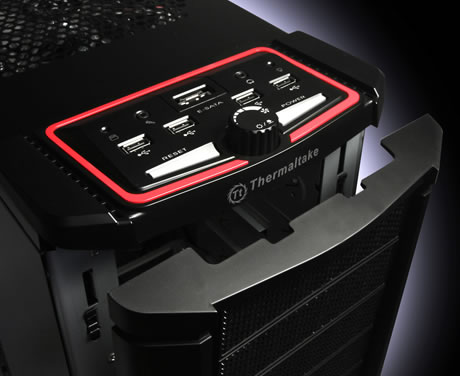
Let's have a closer look to the top fan controller. As you see in the picture below, there are many things going on here. Besides the speed control knob, there are four (4) USB2.0 ports, an e-SATA port, power/HDD LEDs, mic/headphone jacks and reset/power buttons. The fan speed controller also adjusts the color of the backlit fans:
The design of the front panel quite simple.You can easily remove it from the case by pushing it at the bottom side.The front panel is is made out of plastic, meaning that you should handle it with case in case you need to remove it:

Below you see the rear side of the case. The power supply is placed at the bottom and the side panels are kept in place with thumb screws for easy handling and maintenance.

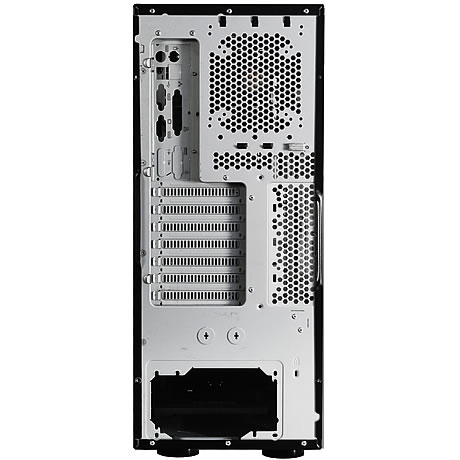
A lock is also available at the bottom right side of the rear panel:

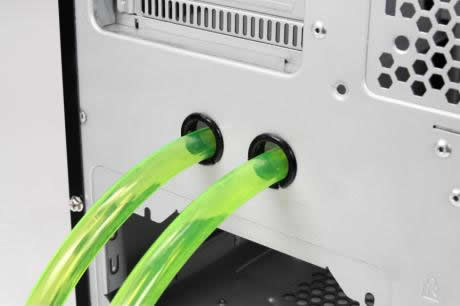
Two holes are also available in case you need to install a liquid cooling set. The case supports 1/2" , 3/8" , 1/4" water tubes:
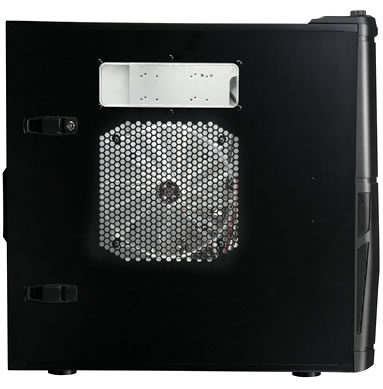
The left panel can be easily removed by just pushing the two sliders to the right. The installed 230mm fan is powered by a special cable and a connector designed to plug itself as soon as you close the case. So as soon as you close the left panel, the fan powers up.

Even the bottom side of the case has been specially designed to free the hot air produced around the area of the installed power supply unit:

3. Installing the components
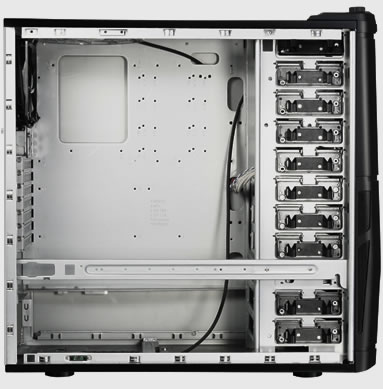
We are ready to open the case and install everything we need to power the PC up. As you see in the picture below, the case offers plenty of free space inside for the motherboard. Five cages for 2.5" devices and 6 cages for 5.25" devices are available:
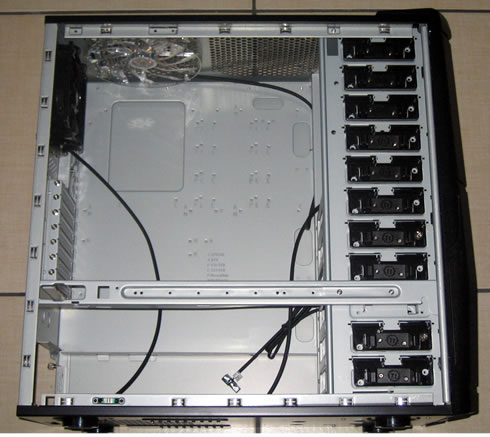
Removing the right side panel unveils the cables of the control panel:

With all this free space available, building the system is very easy. We installed the motherboard very easily guided by the conveniently marked positions for the required standoffs. As always, the installed standoffs should be aligned properly with holes in the motherboard.
Around the motherboard area there are many holes that you can pass the cables through them and avoid the usual cabling mess up you may have experienced with other PC cases:

Thermaltake has carefully designed the HDD bays so they can be easily extracted from the main case. Just press the clip using two fingers and there you go. However, the HDD needs to be secured with traditional screws. A tool-less design would be very handy here.
The Thermaltake Element V Case also supports the installation of a 2.5" storage device (such as an SSD) at the bottom cage.


The 5.25" devices are much easier to install. Again, apply some moderate force to the clip, place the drive into the cage and make sure it is in the right place with its side holes properly aligned with the external black clips:

After spending something installing the top I/O and the power supply cables, we have a good idea of what this case is offering. The holes on the back plate are very handy, allowing you to easily pass the essential 24pin/4+4pin power cables through them. In addition, there is enough free space left between the back plate and the front side of the case to gather the top I/O cables there and have less cabling at the motherboard's side:

What we didn't like was that the USB cables that should be connected to the top control panel are not joined together. This means that you should read the motherboard's manual carefully in order to make the right connections.
Finally, here is how our system looks like after having installed the power supply unit, the motherboard, an Nvidia GTX 460 graphics card an ODD and a HDD. Although we did not arrange the cabling properly for a clean look, there is a lot of space and many options to further hide the cables if you like. Using a modular power supply unit could free up even more space:

Due to the placement of the power supply unit and if you wish to benefit for the extra space behind the back plate, make sure your PSU's power cables are long enough. And don't forget that the case supports installing even big power supply units (>1000Watt).
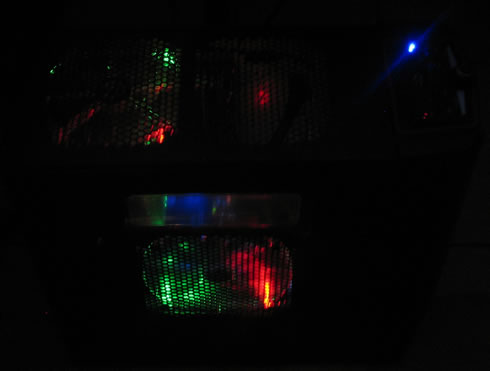
Here is the system up and running in the dark. The top side and the light up to different colors, which can be also completely turned off completely by pushing down the speed-fan controlling knob on the top panel.
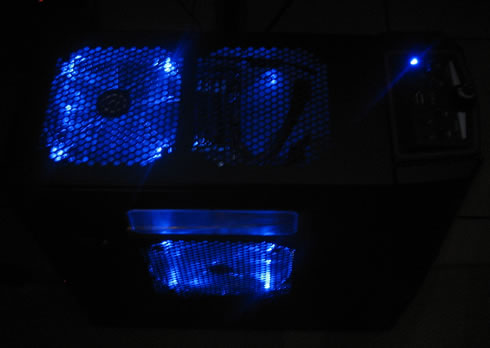

Although you cannot easily realize if from the picture below, the power led at the top I/O panel is very bright and rather annoying :)

4. Final words
The Thermaltake Element V is a well-built and solid PC case designed for powerful PC systems.
The case is made out of high-quality materials and each part of it has been carefully crafted to offer easy and accurate assembling as well as a solid and stylish look. The very handy control and I/O panel found on the top side of the case allows you to easily plug-in your USB flash drive , e-sata device or attach a headphones/mic without searching below your desk, while it also offers a large knob to control your fans' speed and back light coloring.
Speaking of the fans, the basic strength of the Thermaltake Element V is its numerous ventilation fans. There are five of them pre-installed including a 200mm fan placed on its top side, and you can optionally add three more. And with all these fans there, if you are worried about the noise coming out of the box, you'll be pleasantly surprised. The system remains very quiet.
Inside the case there is plenty of space to easily install the motherboard, graphics cards and storage devices. The system has been designed to support up to eleven internal devices. In addition, with the power supply unit installed at the bottom side of the case, you can easily arrange the power cables in order to have a clean look, with a lot of free space left for a more efficient cooling.

The installation of the various components of our PC was easy, with some minor issues reported in the previous pages. These issues are not enough to change our opinion about this case. We feel that the Thermaltake Element V is has solid construction, great quality and offers many extra features that will make your everyday activity with the system easy and fun. Considering what you get, the $170 needed to buy the Thermaltake Element V makes sense and it is definitely a good deal.

Positive
- Solid construction of steel
- Good overall design
- Free space inside
- Five (5) pre-installed RPM-controlled fans
- Can support up to eight (8) fans
- Included fans are backlit and can be turned off
- Supports even large power supply units
- HDD/Optical cage is easy to remove
- Top I/O panel is very useful
- Can easily be upgraded with liquid cooling system
- Good retail price for what it offers
Negative
- Very bright top system led - easy to fix by disconnecting its power cable
- USB headers should have been joined for easier installation
- HDDs could have a screw less installation system