1. Introduction
 Thermaltake
is a well known cooling system manufacturer. It's known to most
users from their extreme air cooling solutions for CPUs. The
recent trend of water cooling couldn't leave Thermaltake out of
the game. A new product called BigWater 760i promises to fulfill your
needs in getting an affordable water cooling solution with ease of
installation and good performance. We will try to find out how good the
overall package is, considering that air coolers are much cheaper and
have adequate performance.
Thermaltake
is a well known cooling system manufacturer. It's known to most
users from their extreme air cooling solutions for CPUs. The
recent trend of water cooling couldn't leave Thermaltake out of
the game. A new product called BigWater 760i promises to fulfill your
needs in getting an affordable water cooling solution with ease of
installation and good performance. We will try to find out how good the
overall package is, considering that air coolers are much cheaper and
have adequate performance.
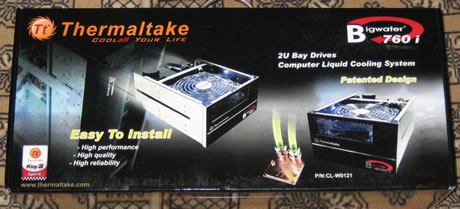
- Thermaltake Bigwater 760i
Thermaltake announced at this year's Computex show,
the next generation of high performance liquid cooling systems, Big
Water 760i. According to Thermaltake, this new breed of liquid cooling
system focuses on ease of use while improving upon the performance
level that Big Water series of water cooling systems have been know for.

Big Water 760i consists of an all inclusive bay drive
unit and a water block with intelligent interconnect that can be
installed effortlessly. Ultra quiet pump, 12CM blue LED fan,
water reservoir and high performance radiator are all strategically
positioned inside the bay drive unit. User can simply install the
bay drive unit into a 5.25” drive bay, secure the water-block on the
CPU and connect the intelligent interconnect to complete this easy
installation process.

To decrease manufacturing cost, traditional water
blocks often are designed with a simple water channel. However, water
within the cooling system travels at very high speed and does not have
sufficient time to absorb heat from the heat source.

To overcome this major downside, Thermaltake developed
a water block with Redundant Micro Channel Design to effectively divide
water flow into micro channels thus accelerating heat transfer from the
heat source to the liquid material. In addition, micro channels are
stacked on top of each other to fully utilize the available space
within the water block and further increase heat transfer.
Intelligent interconnect has built-in automatic
shut-off valves that prevents accidental water leakage while
disconnecting the water tubing while assembly or dismounting. A
feature that greatly decreases the risks of damaging other critical
components from improper installation. In addition to water block, the
pump also plays a determining factor in thermal efficiency.
BigWater 760i utilizes the P500 pump that is capable of pushing 500L/H
(131.9G/H) of water that improves the overall efficiency and cooling
performance. Durable ceramic bearing mechanism also ensures years
of uninterrupted operation.
The radiator is now equipped with the new Dimple Tube
Technology to increase the turbulence within the radiator, effectively
enlarging the surface area of coolant contact and elongating the time
that the coolant stays in the radiator in order to be cooled.
2. Features, Specifications
- Features
- Dual 5.25 Drive Bay design: liquid cooling system in-a-box to save the space in the chassis and simplifies installation
- Mesh design front bezel enhances ventilation
- Easy to install and refill.
- 12cm Motorsports Radiator :
1. DTT - Dimple Tube Technology swirls the coolant within the radiator to increase thermal transfer.
2. An all-aluminum radiator featuring expanded outer fins and tube style for maximum performance.
- Slim Pure Copper Waterblock:
1. Micro-Channel Design within the waterblock maximize the thermal efficiency
2. Advanced Brazing technology improves reliability and leakage free
3. All-in-one mounting design supports all latest CPU from Intel & AMD. (Includes: Intel Socket LGA775 and AMD K8/AM2.)
- Ultra-low noise fan: silent variable fan with blue LED (1600 ~ 2400rpm).
- High-performance Liquid Pump:
1.Silent and powerful P500(500L/hr) pump provide superb reliability
2.The ceramic bearings significantly extend the life-expectancy of the pump.
- Quick connector:
1. Quick Disconnect Coupling: Valves shuts off water flow immediately when dismantling to prevents water leakage
2.User friendly Quick Install Connector saves you time and energy.
- Durable 3/8” Tube: Special material to prevent wear & tare from being clogged up or over bending.
Refill Reservoir:
Transparent reservoir contains 350c.c. of liquid capacity, easy to refill

P500 Pump:
Flow rate : 500L/hr, can easily handle extra water blocks for GPU, memory, HDD or chipsets.

Silent VR Fan:
Adjustable 120x120x25mm blue LED fan, (1600~2400RPM)

CPU Water Block:
Pure copper waterblock designed with brazing technology
Quick Disconnect :
Automatic non-spill valves, robust material, one hand operation

Motorsports Radiator:
Dimple Tube Technology with louvered fin radiator greatly increases the surface area for added cooling capability.
- Full specifications
| P/N |
CL-W0121 |
| 2U Bay Drives |
Dimension |
232mm(L) X 148.6mm(W) X 85mm(H) |
| Weight |
1.3(kg) |
| Application |
CPU |
AMD AM2 series |
| AMD K8 series |
| Intel LGA775 |
| Intel P4 |
| Water Block |
Material |
All copper designed |
| Dimension |
58mm(L) X 58mm(W) X 35mm(H) |
| Quick install connector |
For 9.5mm ID (3/8”) tubing |
| Weight |
311(g) |
| Pump |
Dimensions |
75(L) x 70(W) x 75(H) mm |
| Bearing |
Ceramic bearing |
| Maximum Capacity |
500 L/ hr |
| Rated Voltage |
DC 12V |
| Input current |
600 mA |
| Connector |
4 pin |
| Noise |
16 dBA |
| Life time |
80000 hr (MTBF) |
| Radiator |
Dimensions |
153(L) x 120(W) x 28(H) mm |
| Material |
Aluminum |
| Tube Design |
Aluminum, Dimple |
| Fin Design |
Aluminum, Louvered |
| Quick install connector |
For 9.5mm ID (3/8”) tubing |
| Fan |
Fan Dimension |
120(L) x 120(w) x 25(H) mm |
| Fan Speed |
1600~2400 RPM |
| Rated Voltage |
12V |
| Noise |
16 ~20 dB |
| Life Expectancy |
40,000 hr |
| Connector |
4pin |
| Liquid Tank |
Dimensions |
72.4 (L) x 70.5(W) x 69.4(H) mm |
| Capacity |
130 c.c |
| Quick install connector |
For 9.5mm ID(3/8”) tube |
| Tube |
Dimensions |
9.5mm ID(3/8”) tube |
| Material |
Green UV |
| Coolant |
Capacity |
500 c.c |
| Major Material Ingredient |
Ethylene Glycol |
3. The retail package
Thermaltake's Big Water 760i product costs around $155 (+ shipping). The retail package is big and has a carrying handle on top:
Opening the box unveils what's inside, everything is well placed and secured:

On top we can find two printed manuals, 4m of 9.5mm (3/8") UV
sensitive tube and at the white box, clips and screws for the water
block. Getting to the bottom of this box we can see more, each
component is safely secured at its place and everything is well
organized. The bay drive liquid cooling system, 500cc of UV sensitive
coolant, the refill bottle and finally the CPU water block.

Thermaltake has included a massive 4m water tube with
standard 3/8" diameter. The refill bottle is also a very useful
addition:

Here is what's included in the white box, many screws,
metal H-type clip for the waterblock installation, thumb nuts, thermal
compound and a couple of hose clips for the tube.

The water block in close up


and at the bottom. We can clearly see that it's fully
made of copper, although it isn't completely smooth and there are some
small marks visible on the surface:

The 2U bay water cooling system has a black finish with
the logo and model name written in silver. You can see the small grid
opening for the fan to suck air.


Here is the top view


And the bottom


At the back we find the pump. Thermaltake promises
that can easily handle extra water blocks for GPU, memory, HDD or
chipsets.

The refill reservoir holds up to 350 c.c. of
liquid. It's very easy to refill by unscrewing the cap and using
the provided refill bottle. There are two indicators, low and high, the
liquid level should be in the middle. Be careful and don't try to
surpass the High level indicator because placing back the cap will
cause the coolant to overflow and create a mess. Thermaltake should had
taken care of this issue...

All cables/wires that are coming with the unit are
sleeved in black mesh and bound together with plastic wire ties. The
two main tubes connected with the P500 pump have a tag and a very
easy to hook/remove system with the quick connect connectors:

You need to add power to the Thermaltake 760i from the
main system. The green screw handles the rotation speed of the fan and
at full speed the system makes a lot of noise...

4. Installation
Thermaltake has placed a webpage with installation
instructions and how the whole system works. We will try and give you
with pictures the major steps. First you need to secure the waterblock
on the motherboard. Place the metal H-type clip, cushion and insulator
together below the motherboard. Use the four silver (for Socket 775 in
our case) 5cm screws, don't forget the white/red washers

and use the stands offs to secure the whole structure to the motherboard.

Next step is to carefully install the waterblock and by using the thumb nuts to secure the whole thing:

Then unscrew the nut of the waterblock, insert a tube
through the nut of waterblock and tighten the nut on the waterblock,
you must get something like this...Do the same for the other nut and
cut the tube at the appropriate length according to your case. Finally
use the hose clips and female quick connector through the tube and by
using pliers tighten the hose clips. It's necessary to make the
properly tighten all parts to prevent water leakage.

The installation of the 2U Bay water cooling system
needs two empty 5.25 bays. For our tests we used Thermaltake's Soprano
case. Thermaltake suggests having the 2U bay system above the CPU level
. The refill is an easy task with the included box. After connecting
all the cables, make sure to power up and check the coolant level, it
will drop as it starts to flow around the pump and tubes. Continue to
fill the reservoir tank until it's above the low level. Secure the cap
and that's all. There will be air bubbles around the tube, don't worry
though, just leave the system working for at least 20 minutes and gently
bend the tubes until all the air bubbles are removed from the tubes,
this is an essential step. If things are getting rather difficult, tilt
the chassis at an angle of 45° to the left and then to the right. This
will help the air move through the system. Remember to refill the
reservoir as the air is pushed out.

When everything has finished, you will notice that the
2U water cooling system is about 5cm (2") longer than a standard
optical drive. Now if there isn't enough empty space between the
motherboard and the 2U water cooling bay the installation may not be
possible. The black tubes can be easily replaced with the included UV
sensitive water tube. The fan on the top glows blue, but I guess you
can easily remove it and add something else if you prefer other colors.
The speed control knob included it's obviously placed in the wrong
place, since it's almost very hard to use it with so many cables at the
back. We assume that Thermaltake could have placed it at the front for
easy access. The un installation procedure is almost the same,
Thermaltake has an installation/un installation video in their webpage that you should check before doing anything.

5. Performance
In order to test the Thermaltake Bigwater 760i we used the following system
- Case: Thermaltake Soprano
- Motherboard: Asus P5K3 Deluxe with 0801 BIOS
- CPU: Intel E6750 @ Stock voltage
- Memory: Corsair DDR3-1800 + Corsair's Memory cooler
- HDD: WD 80JB
- VGA: MSI 7600GT Passive
- Operating system: Windows XP SP2 with the latest updates installed
- Ambient temperature: 23 Celsius (via electronic temperature instrument)

The system was installed at the case according to Thermaltake's
instructions. We used Arctic Silver III thermal paste to ensure the
highest thermal dissipation from the processor. We tried to tighten the
screws as much as possible to ensure a perfect fit between the
processor and Thermaltake's waterblock. In Windows XP we used Orthos
stress system software for several minutes and via CoreTemp we logged
all measured temperatures for idle and load modes. All results are
presented below at graph/results tables. Note that we tried the lowest
and highest fan speed for the BigWater 760i, while for Intel stock fan
we also used the maximum speed (Speedfan management under Bios
disabled).
With default settings, we had Vcore of 1.320V

That produced the following results:
CPU Cooler |
Average Temperature |
Intel stock |
46 |
Thermaltake 760i Low Noise fan |
43 |
Thermaltake 760i High Noise fan |
41 |
While on the average performance there isn't much of a difference,
as we better examine the full graph of the processor 's temperatures
after running it for 13mins at full load we saw up to 8 celsius
difference, especially after using the full (high noise) speed of
Thermaltake 760i fan.

Overclocking the processor from 2.66 to 3.60GHz would produce more
heat, don't you agree? The Vcore now is approximately at 1.416V in
order to keep the system totally stable.

That produced the following results:
CPU Cooler |
Average Temperature |
Intel stock |
67 |
Thermaltake 760i Low Noise fan |
63 |
Thermaltake 760i High Noise fan |
60 |
While on the average performance there isn't much of a difference,
we better examine the full graph of the processor's temperatures after
running the test for 23mins at full load. At the maximum load we saw up to 8 celsius difference, especially after using the full (high noise) speed of Thermaltake 760i fan.

The fan is rather noisy even at the lowest rotation speed. Probably
replacing it with something less noisy would be a great idea.
6. Verdict
The
Thermaltake Bigwater 760i is designed to be an entry level product
for amateur users who wish to get an affordable and
complete water cooling kit in order to assemble their first water
cooled PC.
As you can understand the price does matter in that category and you
won't get a top or the best all-in-around solution at the price range
of $150. The installation procedure is simple and easy even for someone
rookie in the water cooling section. Besides the very comprehensible
printed manual, Thermaltake has several videos that should be watched
before starting anything. After unpacking you will understand that
everything is here... You don't need to use nothing else, besides a
scissor to cut at the proper length the water tube. The system can be
upgraded with several GPU blocks, as we can see in the following
picture. So we can say that the system is future proof.

After the positive ones, it's time to mention what we didn't liked.
First of all the radiator's fan is..loud! Even at the lowest rotation
speed produced enough noise to keep you wonder, who said that water
cooling is..noiseless! If you set the fan at maximum speed, then
prepare additional noise. Another problem is that the fan speed control
knob is not placed at the front of the 2U water cooling bay but at
the back. This makes rather difficult changing the fan's speed whenever
you like, since you have to dig for it inside the case between many cables.
Passing to the performance, we hoped to see better results than the
ones we got. First of all there is a "flaw" in the design of Bigwater
760i. The radiator is small and its not placed outside of the box, so
the already hot air isn't enough to cool down the hot water. That is
clearly showed up when we overclocked our Intel E6750 and after 23
minutes of Orthos testing we noticed a gradual increase in water's
temperature. We don't believe that this is a problem of the Bigwater
760i but rather a limitation since the system is compact and its placed
inside the case. So what's the best you can expect, compared to Intel's
stock fan? We managed to see up to 8 Celsius difference at full load,
average temperatures may be even lower. It's possible that such
performance can also be obtained from an air cooler with less money and
installation fuss.
Summing up our presentation, we feel that Bigwater 760i is a good
product for entry level users who wish to explore water cooling
and give a new look at their boxes. Middle to expert users probably
will avoid this product and look for something much more powerful that
will keep their overclocked processor cool for good.
Positive
- Price is good, for entry level water cooling users
- The retail package is superb, everything is included
- The installation process was very simple even for amateur users
- It uses only two 5.25 empty spaces to be installed
- You can use other water blocks from Thermaltake (VGA, HDD) to further expand system
Negative
- The included fan is too loud even at lowest rotation speed
- The control knob regulating the fan speed is at the wrong place
- Performance was not so impressive to justify the 150$ that Thermaltake wants in order to buy the product