1. Introduction
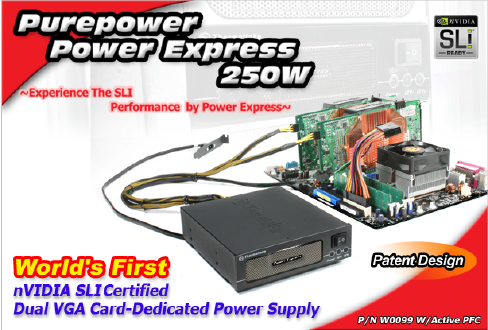
 Today, we will be reviewing the first nVidia SLI certified PSU to hit the market, the Power Express 250W from Thermaltake. Nowadays, many PC gamers are facing power supply problems when they decide to install two graphics cards, whether it be in SLI or CrossFire mode. The most common problem occurs, while gaming or benchmarking, when the system demands more power from the PSU. If that demand cannot be met, the system shuts-down. Now, there is a solution and it comes from Thermaltake, the Power Express 250W.
- Features:
- World's First nVIDIA SLI Certified Dual VGA Card-Dedicated Power Supply
- Standard 5.25" design: fits into any 5.25" drive bay of all cases
- Two 6-pin PCI-Express connectors support nVIDIA SLI technology
- Work with main power supply: reduce the loading on current PSU and no need to upgrade current PSU while running dual card mode
- Keeps stable power input for graphic cards to maximize the overclock-ability & performance
- Three LEDs display: red for power on, one green LED for 12V1, and another one for 12V2
- High reliability: MTBF>100,000 hours
- Protections: Input Circuit, Over Power, Short-Circuit, Under Voltage, Over Voltage, and Over-temperature protection
- Safety / EMI Approvals: CE and FCC certified
- Specifications
Below, you can see the specifications for the Purepower Power Express 250W PSU.
| Model |
W0099 |
| Maximum Power |
250 Watts (Peak Load: 300Watts) |
| Color |
Black |
| Switches |
ATX Logic on-off additional power rocker switch |
| PFC (Power Factor Correction) |
Active PFC |
| Cooling System |
4 cm Fan
SPEED: 5500 (+/- 10%) RPM
DIMENSION: 40 X 40 X 20 mm
AIR FLOW: 6.3 CFM
TEMP. AUTO CONTROL |
| Noise |
20dB at 2000RPM |
| Over Voltage Protection Recycle AC to Reset |
Maximum value not over 12.8~15.5V |
| Dimensions |
16.4cm(L)x14.5cm(W)x4.1cm(H) |
| Net Weight |
1.2 kg |
| Input Voltage |
90VAC~264VAC |
| Input Frequency Range |
47 ~ 63 Hz |
| Input Current |
5A |
| Hold-up Time |
16ms |
| Efficiency |
Above 75% at full load |
| OUTPUT |
| Voltage |
+12V1 & +12V2 |
| Max. Load |
21A (Peak Load: 25A) |
| Min. Load |
0A |
| Output Voltage |
11.4VDC~12.6VDC |
| Ripple & Noise |
Less than 100mVpp |
- Retail Package

The retail package is complete and includes everything you will need. Mounting screws, cables, two cord clips and a detailed User's Manual that helps you set-up the PSU and make all the required connections.
|
| 250W power supply unit... |
|
| four mounting screws & two cord clips... |
OK, now that we've covered the features and specifications, let's move on to the next page, and have a closer look.
2. A Closer Look

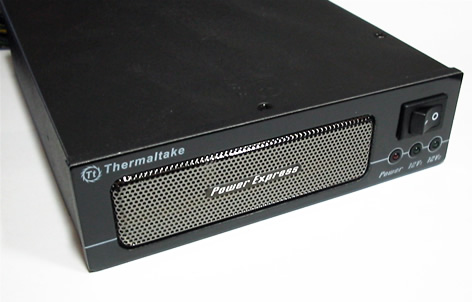
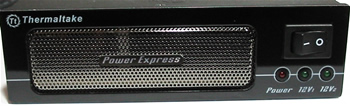
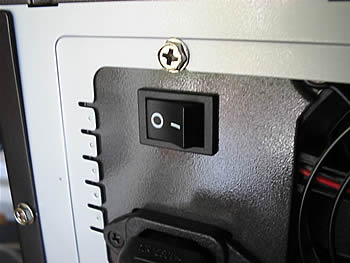
The front design is eye catching. Reflective black front panel, equipped with a cooling vent which has the Power Express logo on it. On the right, you will find a power button and underneath, the three LEDs show the operating status.
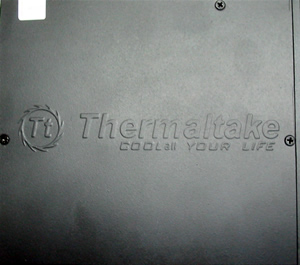
On the top cover, you will find the 'Thermaltake cool your life' logo...

Specifications regarding voltages and power output, can be found on the label, which is located on the bottom of the PSU...

On the back, we have the cables and a 4cm 12V Fan, that draws air out from the unit. Notice also, that all the cables are internally connected and cannot be detached, so that could be a problem during the installation procedure, especially when other 5.25" devices are already installed in the drive bay.
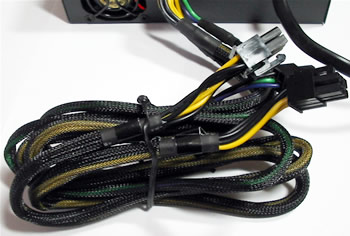 |
| 2x PCI-Express Connectors & 1x 4-pin Connector for receiving Signal from Main PSU for synchronal Power On/Off |
All the cables are covered with black, cable sleeving...

The power cord terminates on a black PCI bracket, which connects to the external AC power cable.
OK, let's install it on our "gaming" system.
3. Installation
For our review, we used the following testbed:
- Processor: AMD64 4800+ (939 socket)
- Case: Thermaltake Soprano
- Motherboard: MSI K8N Diamond + WiFi
- Graphics cards: XFX 7800GTX 256MB in SLI mode
- Memory: 2x512MB Kingston KVR400
- Hard Disk Drives: WD2500JS (SATA II) 250GB 7200RPM, WD3000JD (SATA) 300GB 7200RPM
- DVD Burner: NEC ND-3520A, Plextor PX-708A
- Floppy disc
- Power Supply: Akasa PowerPlus 650Watt
- OS: Microsoft WindowsXP Pro SP2
- DirectX: v9.0c
- Nvidia ForceWare: 84.21

First, start by turning off the main power supply and remove the power cable from the socket.
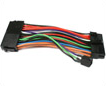
Open the case, unplug the 24-pin ATX power cable running from the main power supply to the motherboard, and connect it to the 24-pin adapter supplied in the Thermaltake bundle.

Then connect the adapter to the motherboard's ATX power connector...
The next step is to install the Thermaltake PSU in the 5.25" drive bay. We used a Thermaltake Soprano case, which offers sliding guide-rails for installing 5.25'' devices, so all we had to do was screw the guide rails onto the sides of the Thermaltake PSU. Nice and simple. :-P
 |
| Sliding guide-rail, designed for easy 5.25'' device installation... |

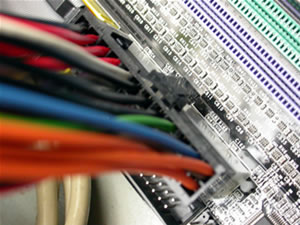
Now, with the PSU in position, connect the 4-pin connector located on the Thermaltake PSU to the 24-pin adapter, which is connected to the motherboard...
 |
 |
| 4-pin connector |
24-pin adapter |

Don't forget to connect the PCI-Express Connectors on the Graphics cards...

And finally, remove one expansion slot cover and screw in the AC power PCI bracket to the back of the chassis. At this point, we had to remove our FireWire bracket, since there were no spare slots.... :-(

Plug the power cord into the socket, turn on the main power supply, then the Thermaltake power supply and fire-up this power demanding 'beast!!'....

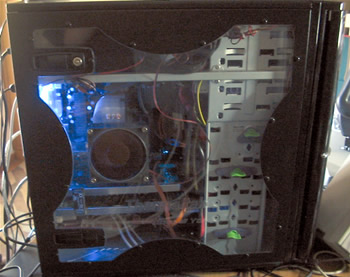 |
| Up and running... |
 |
| Power LEDs while in idle... |
 |
| Power LEDs while gaming... |

4. Performance
Before we begin, it is worth mentioning that we had faced power problems in the past, initially with a Heroichi Win Power 550W PSU, which is supposed to support the Nvidia SLI.
More specifically, the Heroichi Win Power 550W couldn't run the 3D Mark05 benchmark to its end. Usually, the PC would shut-down during the 3rd test. We tried running the tests after disconnecting the chassis fans, DVDs and the second HDD, but unfortunately, the results were the same. We then used a certified SLI PSU from Akasa, the PowerPlus 650W. However, our problems were not totally fixed. The PSU was able to run the 3D Mark05 benchmark if three fans were installed, but when we decided to install the fourth fan, the PC shut-down during the 3rd test. :-(
The output power specs for the Akasa PowerPlus 650W are given in the following table:

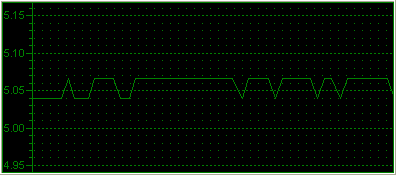
We used the Speedfan utility in order to check the voltages on our system with the Thermaltake Power Express 250W installed. We took two measurements, one in idle and one while running the 3DMark2005 benchmark. In the latter case, we also set the rotation speed of our four fans (3x120mm, 1x80mm) to maximum for more power consumption. Our system has two XFX 7800GTX VGA cards in SLI mode, two hard disk drives and two DVD burners.
The following table lists industry wide specifications for DC Output Voltage Regulation.
| Output |
Range |
MIN |
Normal |
MAX |
Unit |
| +12V1DC |
±5% |
+11.40 |
+12.00 |
+12.60 |
Volts |
| +12V2DC |
±5% |
+11.40 |
+12.00 |
+12.60 |
Volts |
| +5VDC |
±5% |
+4.75 |
+5.00 |
+5.25 |
Volts |
| +3.3VDC |
±5% |
+3.14 |
+3.30 |
+3.47 |
Volts |
| -12VDC |
±10% |
-10.80 |
-12.00 |
-13.20 |
Volts |
| +5VSB |
±5% |
+4.75 |
+5.00 |
+5.25 |
Volts |
- Thermaltake Power Express 250W
+12V
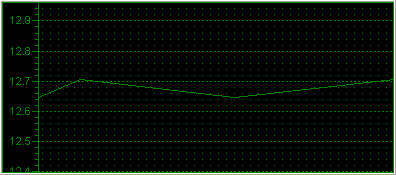 |
| Idle |
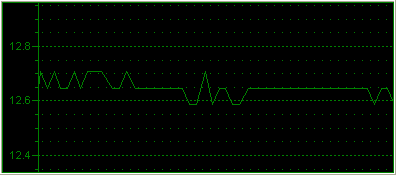 |
| 3DMark2005 |
+5V
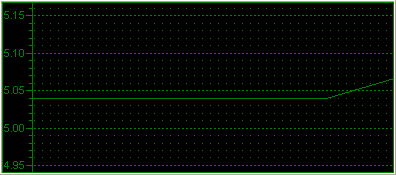 |
| Idle |
 |
| 3DMark2005 |
+3.3V
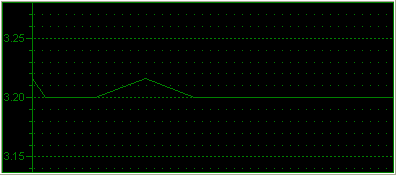 |
| Idle |
 |
| 3DMark2005 |
+5VSB
|
| Idle |
|
| 3DMark2005 |
And YES!! we were finally able to run the 3D Mark05 benchmark with four fans and without having any power problems.
5. Conclusion

Thermaltake is known for its high quality PC products, PC cases for modding enthusiasts, and fancy CPU and GPU coolers. Throughout these pages, we've taken a fairly detailed look at the Power Express 250W PSU, designed for dual SLI systems. We were very pleased that the power problems that we had faced in the past were now finally solved with this extra PSU, especially after having tried so called SLI certified PSUs which as it turned out, could not handle the power demands of an extreme gaming or heavily modified PC, with extra devices like fans, HDDs etc.
The Power Express 250W is really easy to installed, and takes up one slot in the 5.25" drive bay and one PCI expansion slot on your system. However, since an SLI system doesn't have too many free PCI slots, it could be a problem for many users. On our system we had to remove our FireWire PCI bracket to make room. Finally, the design of the Thermaltake PSU will suit most modding enthusiasts tastes, with its fancy reflective black surface and eye-catching activity LEDs on the front panel.
The price at the time of this review for the Power Express 250W PSU was US$45, according to Thermaltake, which is a good price.