1. Introduction
 Vantec Thermal Technologies was established in 1994 and has been manufacturing a variety of products for both "mainstream and enthusiast users". Cooling solutions, peripherals, storage devices, power supplies, PC modifications, even notebook accessories are some of the products currently available on the market from Vantec.
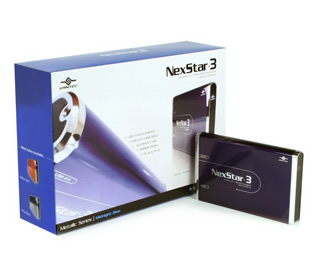
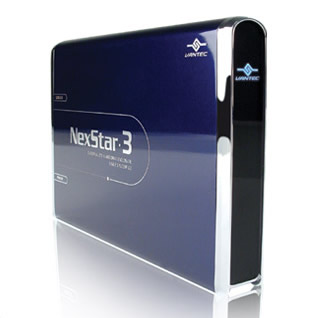
We recently received Vantec's NexStar 3 (NST-260U2-BL), a very impressive external case for 2.5" HD.
Features
- Aluminum Casing Cools Down Your Hard Drive
- Transfer Rates Up To 480MBPS w/ USB 2.0 (12MBPS w/ USB1.1)
- Easily Add Storage To Any System With USB
- Hot-Swappable: Plug And Play Without Rebooting
- Attractive Blue LED Indicates Power/HDD Activity
More detailed specifications can be found in the following table:
| Specifications |
| Model |
NST-260U2-BK, NST-260U2-BL,
NST-260U2-RD |
| Interface |
IDE to USB 2.0 |
| Dimension |
132 X 80 X 15 mm |
| Supports |
Window 98SE / ME / 2000 / XP
Mac OS 8.6 & Above |
| Package Includes |
Driver Disc, User Manual, 2.5" HDD Enclosure, USB / Power Cable, Screws, Carrying Bag |
| Platforms |
Window 98SE / ME / 2000 / XP
Mac OS 8.6 & Above |
| System Requirements |
Intel Pentium II 350 MHz-compatible or Mac G3 processor & greater
Microsoft Windows 98SE/ME/2000/XP or Mac OS 8.6 & greater
USB-equipped system.
For USB 2.0 speeds, the system must support USB 2.0 specifications
CD Rom drive (if drivers are needed) |
2. Package - Installation
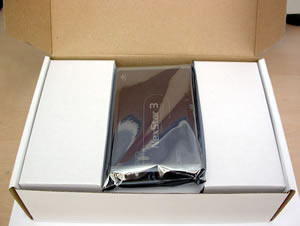
As soon as you open the package you'll see the NexStar 3 sealed in an anti static bag.
 |
| Remove the NexStar from the bag. |
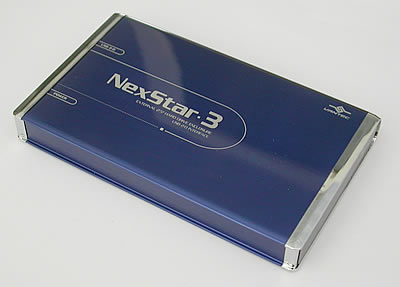
You'll need to remove the blue metallic cover in order to install the hard drive.

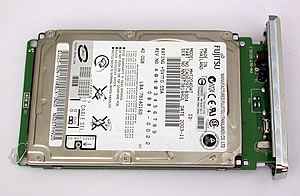
Place your 2.5" HD on the NexStar tray as shown in the following photo.
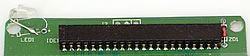 |
| NexStar's HD slot |
 |
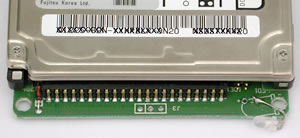
| Hard Disk's connector |
 |
| Slide the HD connector into the NexStar slot |
 |
| NexStar with HD connected |
 |
| Slide the tray back inside the metallic case. |
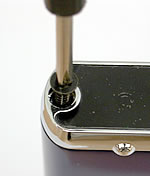 |
| Don't forget the screws... |
 |
| ...and you're finished. |
The included cable for connecting the NexStar to the PC has a mini USB connection on one end and two connections at the other end, one USB A and one USB A-A /M-F which connect to the USB ports on your PC. Some HDD require a considerable amount of current in order to work, 0.5~1.0A, so you'll you have to connect both USB A connectors to your PC. It is also possible to use an external supply instead, which connects to a 5VDC inlet on the back of the NexStar. Check the power requirements of your hard drive before installing. (The external power pack is not included in the package).
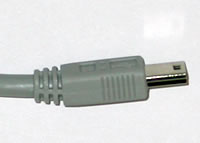 |
| Mini USB connects to the NexStar |
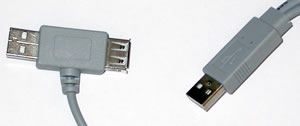 |
| USB A-A/MF and USB A connect to the PC. |
As soon as you connect the NexStar 3 to your PC, it will be identified and reported with the name of the installed HDD. In our case, we used an 80GB HD from Fujitsu.

The NexStar 3 should be detected by your OS and automatically installed. If you have any problems, you can consult the included manual.
 |
| Installation Manual |
For Win98SE and Mac OS 8.6, you'll have to use the following CD in order to install the NexStar 3. For further instructions, consult the included manual. For Windows ME/XP/2000, no drivers are necessary.
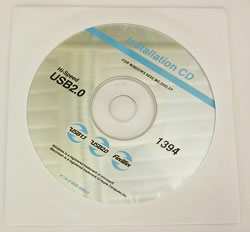 |
| Installation CD |
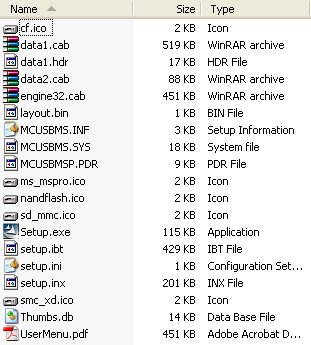 |
| The contents of the Installation CD |
As soon as the NexStar 3 is identified by the OS, you'll have to initialise and partition the Hard Drive before using it. You can find further details on this in the manual. Note that the device will be recognised by the hard disk's ID and not as the NexStar.
 |
| NexStar 3 while working |
CAUTION: Never remove the NexStar 3 while it is in use. It is highly possible the HDD could be damaged or files corrupted.
We recommend you keep the NexStar 3 in its black case, protecting it against dust, scratches or any other kind of damage.
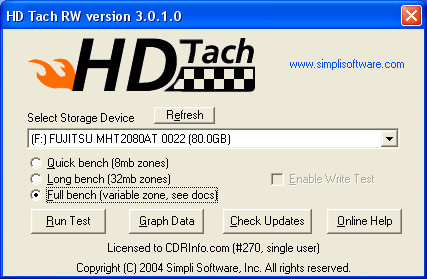
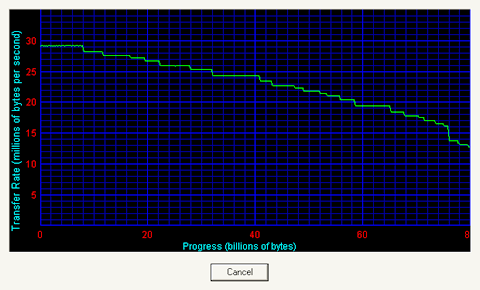
3. HD Tach

HD Tach Tests
HD Tach tests the sequential read, random access and interface burst speeds of your attached storage device (hard drive, flash drive, removable drive, etc). All drive technologies such as SCSI, IDE/ATA, 1394, USB, SATA and RAID are supported. Test results from HD Tach can be used to confirm manufacturer specs, analyze your system for proper performance, and compare your performance with others.
This benchmark is intended to determine the maximum read or write speed on the device at various locations. Hard drives, for example, have faster read/write speeds at the inside edge (mapped to block 0) of the device, so it is useful to see the difference in speed. The maximum sustained speed (lowest speed on the device) is an important metric for real time sequential access applications. The maximum speed may be important to a power user that would like to partition the drive into a high speed partition and low speed partition.
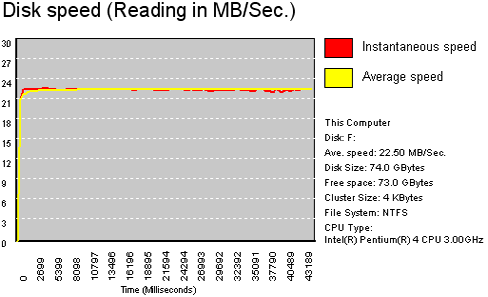
The performance is highly dependant to the HD you will use. For our tests, we present how the NexStar 3 performs with an 80GB HDD installed and we compared it with TEAC'sHT-15OT which has exactly the same HDD.
Vantec NexStar 3
TEAC HT-15OT
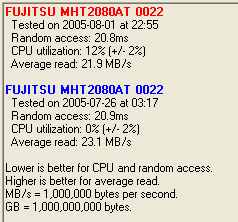
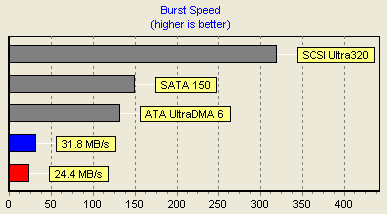

The Vantec NexStar 3 reported good performance. It would appear that the VIA chipset used in the TEAC HT-15OT, is responsible for the higher transfer rates.
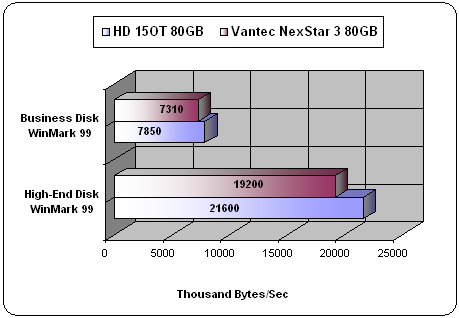
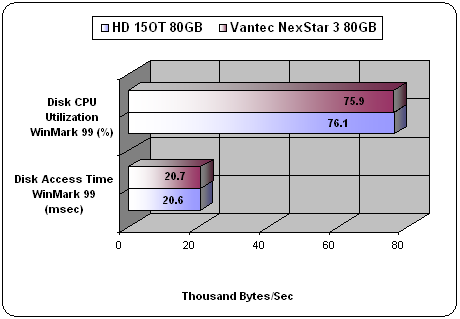
4. WinBench 99

Ziff Davis Media's WinBench 99 is a subsystem-level benchmark that measures the performance of a PC's graphics, disk, and video subsystems in a Windows environment. WinBench 99's tests can run on Windows 95, Windows 98, Windows NT, Windows 2000, and Windows Me systems.
 |
| NexStar 3 |
 |
| HT-15OT |
The NexStar 3 started with a lower transfer rate of 25 MB/sec as opposed to the 30 MB/sec for the HT-15OT but maintains this transfer rate up to the 32 GB mark. From this point onwards, both devices exhibit almost identical performance. As was mentioned earlier, the higher performance is most probably due to the VIA chipset used by the HT-15OT.
5. Performance Test v5.0
 Passmark PerformanceTest is an award winning PC hardware benchmark utility that allows everybody to quickly assess the performance of their computer and compare it to a number of standard 'baseline' computer systems.
Twenty seven standard benchmark tests are available in seven test suites plus there are five advanced testing windows for custom benchmarking. CPU Tests, 2D Graphics Tests, 3D Graphics Tests, Disk Tests, Memory Tests and CD/DVD Tests. In our case we selected the Disk suite Tests.
Passmark Disk Test
This suite contains a number of tests that exercise the mass storage units (hard disk or otherwise) connected to the computer. By default drive C: is used but this can be changed from the Preferences Dialog.
For each test a file is created in the root directory of the selected disk. The file size needs to be large in order to get an accurate measurement. In the case where a slow drive is used on a computer with a large amount of RAM this test can take some minutes to complete.
There are a few issues to aware of when interpreting the results of the disk test. These are covered in the precautions section.
- Disk Sequential Cached Read
A large test file is created on the disk under test. The size of this test file is proportional to the amount of RAM available, which stops the entire file from being cached in RAM. The file is read sequentially from start to end. The amount of data read in each individual read operation is always 16KB
- Disk Sequential Cached Write
A large file is written to the disk under test. The size of this test file is proportional to the amount of RAM available. This stops the entire file being cached in RAM. The file is written sequentially from start to end. The amount of data written in each individual operation is always 16KB
- Disk Random cached Seek RW
A large test file is created on the disk under test. The size of this test file is proportional to the amount of RAM available, this stops the entire file being cached in RAM. The file is read randomly; a seek is performed to move the file pointer to a random position in the file, a 16KB block is read or written then another seek is performed. The amount of data actually transferred is highly dependent on the disk seek time.
| |
NexStar 3 |
HT-15OT |
 |
 |
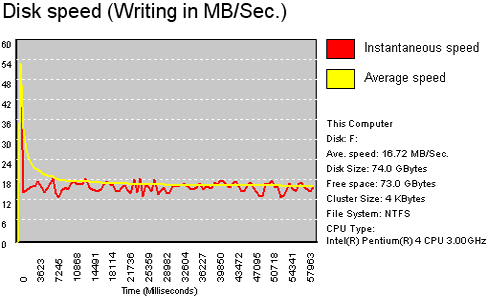
The VIA chipset allows the HT-15OT to operate faster at both reading and writing. In the Random Seek + RW test, both devices were equal.
6. SiSoft Sandra 2005
 SiSoftware Sandra is a 32 and 64-bit Windows system analyser that includes benchmarking, testing and listing modules. It tries to go beyond other utilities to show you more of what is really going on under the hood so you draw comparisons at both a high and low-level in a single product.
You can get information about the CPU, chipset, video adapter, ports, printers, sound card, memory, network, Windows internals, AGP, ODBC Connections, USB2, Firewire etc. You can save/print/fax/e-mail/post/upload or insert into ADO/ODBC databases reports in text, HTML, XML, SMS/DMI or RPT format.
This version supports multiple sources of information gathering including: remote computers, PDAs, Smart Phones, ADO/ODBC databases or saved system reports. All benchmarks are optimised for both SMP & SMT (Hyper-Threading), up to 32/64 CPUs depending on the platform.
File system Benchmark
- The "File system benchmark" tests how your drive(s) and controller(s) compare to other devices in a typical system:
· Read Test: Buffered, Random, Sequential
· Write Test: Buffered, Random, Sequential
· Seek Test
The "Drive Index" mark is a composite figure representing an overall performance rating based on the average of the read, write, and seek tests, and file and cache size. The Drive Index is intended to represent drive performance under typical use in a PC. A larger number means better performance. The weighting of the results is not equal and represents the distribution of different files sizes as used on these devices (obtained through field research).
| File system Benchmark |
| NexStar 3 |
 |
| HT-15OT |
 |
Very good Drive Index mark for the NexStar 3 although it is not as good as the TEAC HT-15OT.
Removable Storage/Flash Benchmark
- The "Compact Flash" typical usage model for these devices is File operations, such as Writing a file to the device, reading a file from it, and deleting a file. This benchmark exercises the devices in terms of these operations (to measure the “raw” cluster level performance of the device, it is recommended to also test it by means of the File System Benchmark module). The following characteristics are measured for each of the four representative file sizes of 512 Bytes (representing a minimal single data cluster file), 32kB, 256kB and 2MB. The weighting of the results is not equal and it represents the distribution of different files sizes as used on these devices (obtained through field research). For each of the four file sizes, a Combined Index is then calculated, stating the combined performance in terms of Combined Operations Per Second, with respect to a mix of write, read and delete operations.
- Combined Device Index: is a composite figure representing an overall performance rating based on the average of the Combined Index figures over the four file sizes. (Higher is better, i.e. better performance)
- Endurance Factor: is a figure representing the Wear and Life Expectancy of flash devices; this is obtained by dividing the average performance (normal condition, i.e. sequential write) to the lowest performance (high-stress condition, i.e. same block re-write). It measures the relative improvement of endurance caused by the wear leveling or flash management algorithm; the absolute endurance of a device (i.e. its expected life-time) is directly dependent, in addition to this Endurance Factor, on the nominal manufacturer rating of maximum erase/reprogram cycles, which is typically 100,000+ for SLC and 10,000+ for MLC devices. (Higher is better, i.e. longer life-time for the device)
| Removable Storage/Flash Benchmark |
| NexStar 3 |
 |
| HT-15OT |
 |
In this benchmark, the NexStar 3 reported better overall performance while longevity also seems to be better.
7. Conclusion
Vantec's NexStar 3 is a very stylish case for 2.5" HDD. Not requiring any software installation, you can very easily use it to backup or transfer your data between systems. Available in three colors, black, blue and red, they cater to everybody's taste.
Concerning the performance of the NexStar 3, this is very dependent on the Hard Disk Drive you install. In order to put the device through its paces, we installed an 80GB HD from Fujitsu. The overall performance was satisfactory but maybe with a slightly better controller chipset, it could be even better. The most important thing is that it doesn't leave a lot of room for complaints...
The retail price on the e-market for the Vantec NexStar 3 is around US$30. The price is very reasonable and if you already have a HD from an old laptop for example, you have a complete backup device for a rather low price. If you don't have a HDD, then you can get a 10GB or a 60GB HDD for US$45 and US$90 respectively. Note that a similar, ready to go 60GB storage solution from most manufacturers costs around $130.
